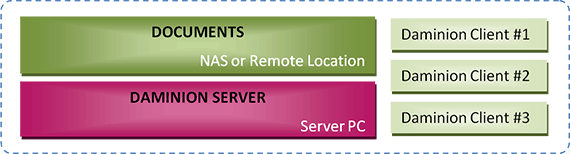
This is the most common setup, but not necessarily the best.
Pros:
- Quick Start: you can start using Daminion quickly, without breaking your existing workflow. You simply need to specify where you’d like your image library to be located on Daminion Server and then press the “Add” button.
- MacOS or Linux-based computers may have access to shared files on a remote network
Cons:
- Slow. The speed at which you can import files, update metadata, and preview images is highly dependent on the network bandwidth between the Server PC and the computer on which the Documents are located.
- Insecure. There is a risk that files accessible from outside the Daminion Server Control Panel could be “screwed-up” when using Windows Explorer or any other file explorer.
- No Version Control in older versions (4.1 or lower). The Version Control feature is disabled for all shared files. This is to prevent them from being accessed from outside the Daminion Server control and to avoid damaging the Version Control mechanism.
Recommendations:
If you decided to stick with this approach please make sure that you:
- Use at least 1 GBit network environment.
- Install Daminion Server on a computer with a minimum of 16 GB RAM, an i7, i9 (Xeon) processor, a separate hard disk with plenty of free space.
- Find all system requirements here.
- Make sure that Daminion server service logon user has full access permissions to your NAS. It can be a dedicated network user or a local user with the same user name and password as an admin on NAS. Find more information here.
- Add Daminion Server database to your existing backup schedule. Learn more about how to backup your Daminion Server database or add it to your existing backup tool’s scheduler.
- Wherever possible, please consider using Scheme B.
SCHEME A. How to add an EXISTING media archive to Daminion Server
If your photos and other media documents are already located on a NAS or a shared network location please follow the steps below.
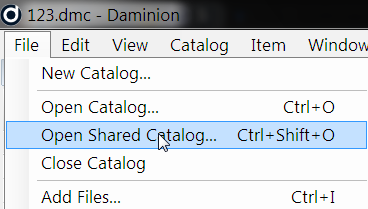
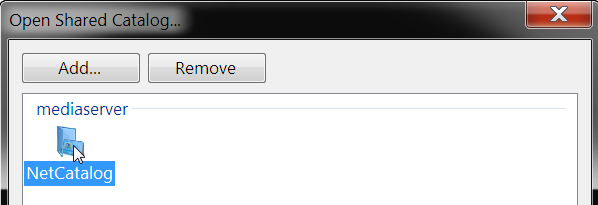
Install Daminion Server on a server computer. This can be any computer on your local network that acts as a server. Install Daminion Client on a client computer somewhere on your local network and launch it. Go to the File menu and navigate to the “Open Shared Catalog…” option.
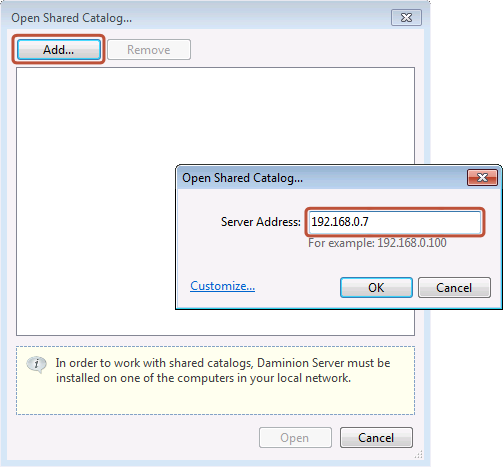
Press the “Add” button and enter your server PC’s name or IP address. You can get this info from the Dashboard on the Daminion Server Administration Panel on your server PC.
Double click on the catalog icon that appears.
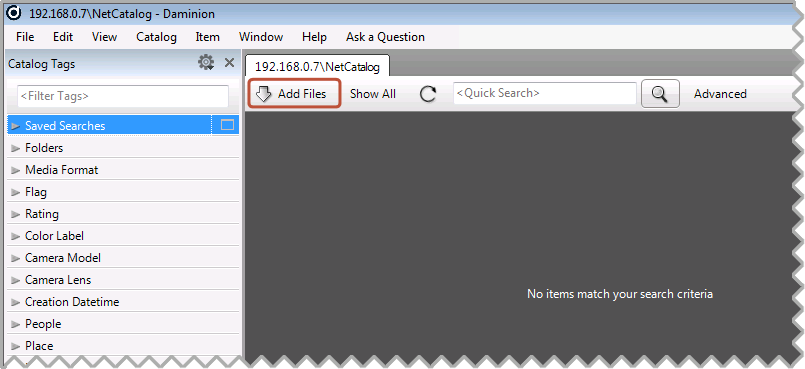
If everything’s OK, you’ll see an empty workspace that will open with the name of your server or your IP address as the title in the tab at the top of the page. Click on the “Add Files” button and select the files to import into your Daminion Server.
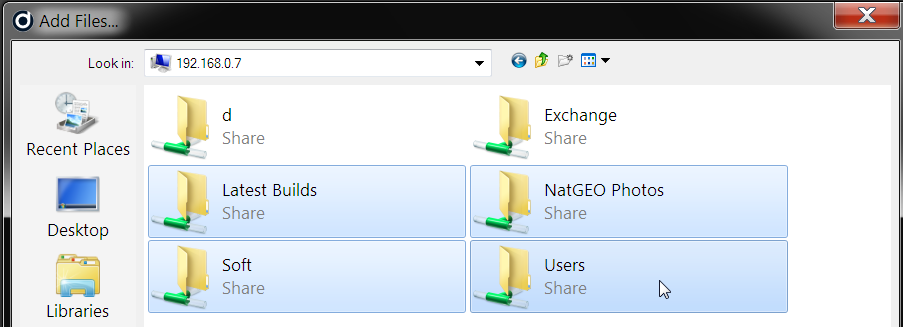
Now locate and select the remote shared folders that contain the documents you want to import (you can select multiple folders) and click the “Add” button.
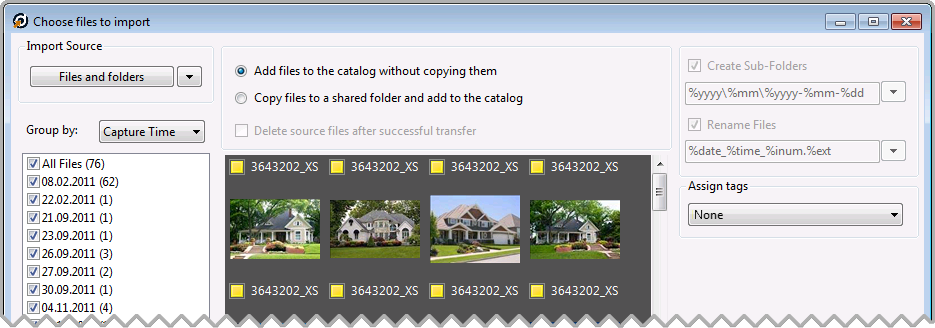
Daminion’s Import window will appear. Select the “Add Files to the catalog without copying” option and press the Import button. Only links to the selected documents will be added to the Daminion Server, without copying the actual files to the server PC.
The import process will take some time, but it works in the background so you can start working with Daminion Client immediately. Once the import is complete your documents and their descriptions will be visible to other Daminion Clients connected to the Daminion Server.
SCHEME A. How to add NEW files to Daminion Server
Method #1
- Launch Daminion Client and open your shared catalog.
- Click on the “Add Files” button and select files you want to import to the opened catalog.
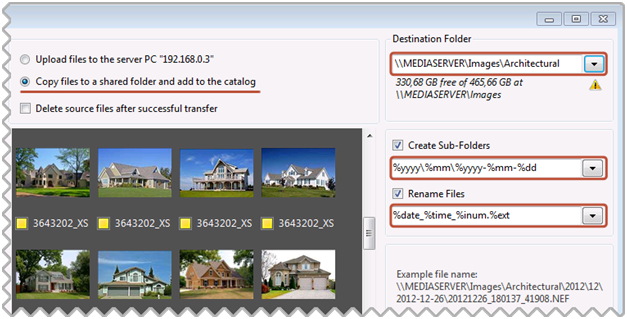
- Check the “Copy files to a shared folder…” option.
- In the panel on the right, specify a storage destination for the imported files. You can also specify file/sub-folder naming rules.
- Click the Import button
Method #2
- Launch Daminion Client and open your shared catalog.
- Use Windows Explorer or any other file manager to copy new files to the shared network folder where all your documents are stored.
- Import the copied files using the “Add Files…” button
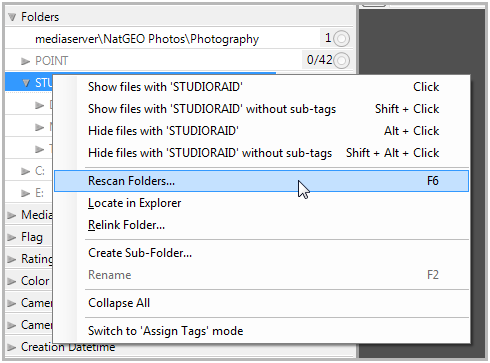
- You can also import newly added files to already imported folders with the “Rescan Folders…” option. To do this, right-click on the root folder and navigate to the “Rescan Folders…” option on the context menu.