Shared Collections is an easy way to share your digital assets with your clients and colleagues. You can share selected files by links without having to grant access to your entire catalog or register new user accounts.
How to create a shared collection
Select one or multiple images by checking the box in the upper right corner of the thumbnail. Hold down the Shift key to select multiple files.
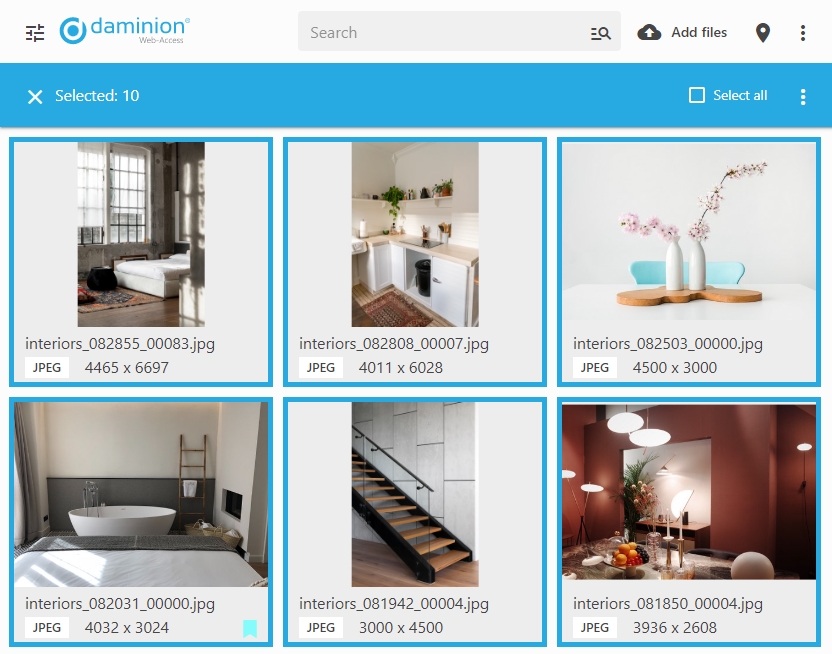
Hint: If you need to select all displayed items, first select one item only, and then click Select all on the toolbar.
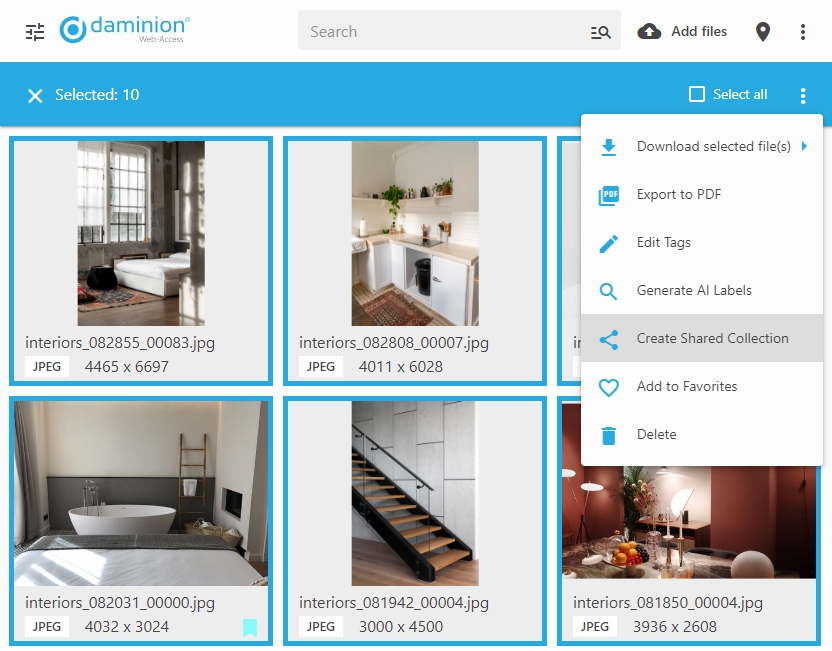
You now have two ways to make a shared collection.
- Hover your mouse over one of the selected thumbnails, click the three dots icon and click the
 Share icon.
 - Alternatively, click
 icon in the upper right corner of the thumbnail window and select Create Shared Collection.
Whichever way you choose, the Share Files dialog window will appear. This is where you set up the properties of your shared collection.
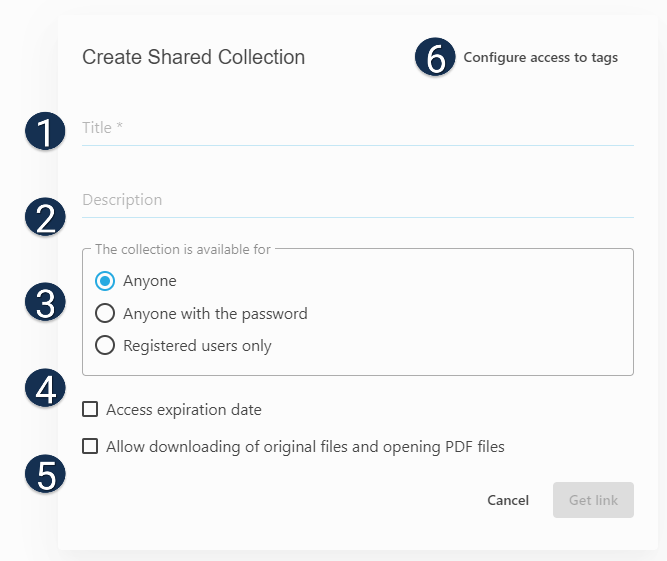
1- Specify a title for the shared collection here. Please note that this is a required field.
2- Add a description (optional).
3- Define the access parameters of the shared collection. If the collection is password-protected, make sure to provide the password along with the access link.
4- Set an expiration date for the collection. Once the collection has expired, it remains visible in the Shared Collection window to the owner of the collection and the admins, but cannot be accessed externally.
5- Specify whether or not the original files can be downloaded. Without this checkbox, you cannot view PDF or play audio files in the shared collection.
Once the collection preferences are set, click “Get Link” to create a new shared collection or click “Cancel” to quit the menu.
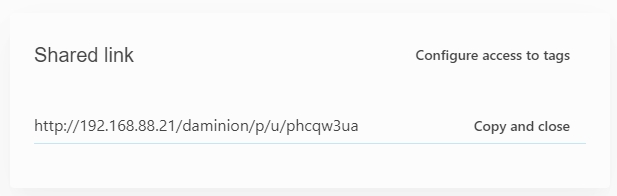
After clicking “Get Link” you will see a window with the sharable link.
What a shared collection looks like
Your shared collections can be accessed via unique URLs created for each collection.
Depending on the collection settings, the appearance and the properties of the shared collection may differ.
The screenshot below shows the recently created shared collection.

1- Title and Description (if any) are displayed here.
2- Sort files by available criteria (Filename, Media Format, File size, etc.)
3- Download the collection as a ZIP archive (available only if Allow to Download Original was selected). You can also select two or more files and download them as ZIP.
Click the download icon on a file to download it separately (available only if Allow to Download Original was selected).
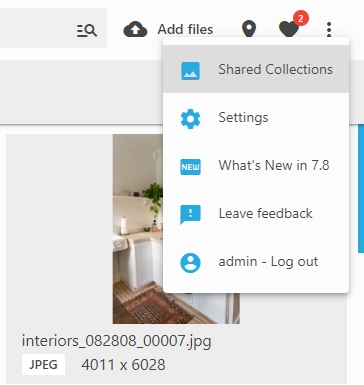
Access your shared collections
All your shared collections can be accessed by clicking![]() icon in the upper-right corner of the interface and selecting Shared Collections.
icon in the upper-right corner of the interface and selecting Shared Collections.
You can manage your collections here and get their sharable links again.

Click the ![]() icon to quickly open the shared collection in a new tab.
icon to quickly open the shared collection in a new tab.
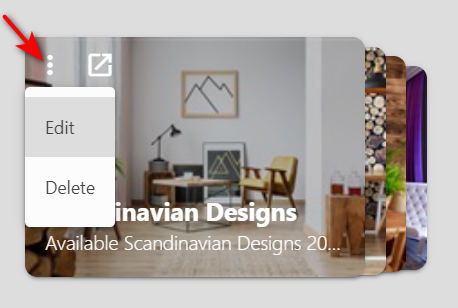
Click the three dots icon on the preview of the shared collection to edit or delete the collection.
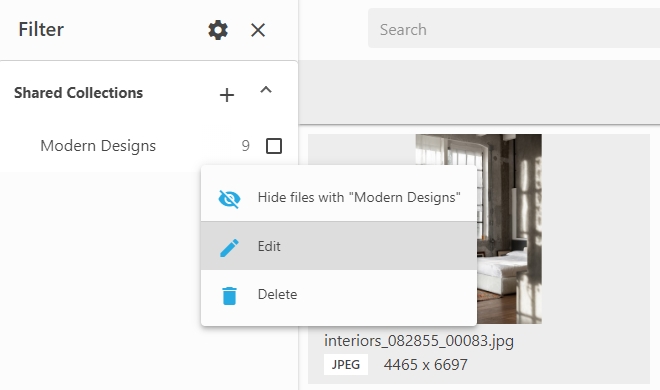
Alternatively, display the Shared Collection tag in the Filters panel, click ![]() icon next to it and select “Edit” or “Delete“.
icon next to it and select “Edit” or “Delete“.
How to display the contents of a shared collection
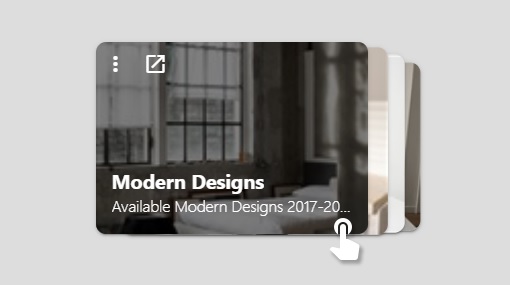
To display the contents of your shared collection, go to the Shared Collections area and simply click on your collection thumbnail:
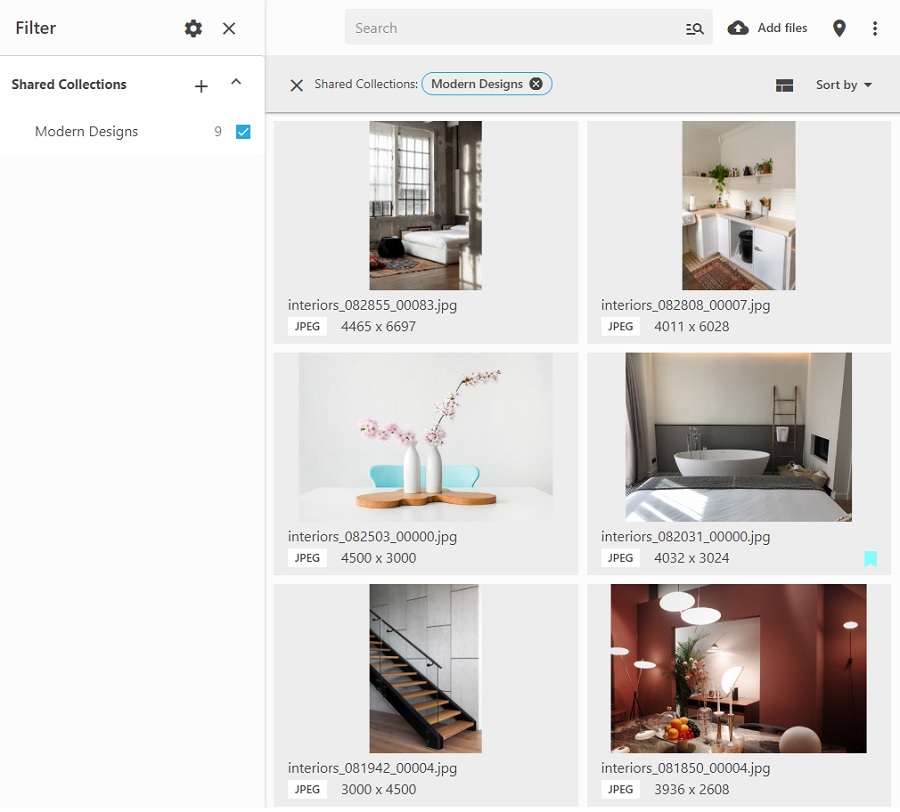
Alternatively, display the Shared Collection tag in the Filters panel and select it:
How to add more files to the shared collection
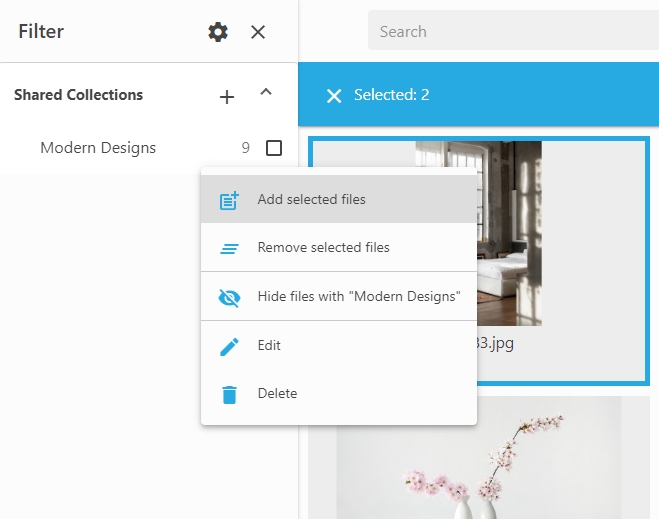
To add more files to the already created shared collection, display the Shared Collection tag in the Filters panel, select the files that you want to add and drag and drop them onto the name of the shared collection.
Alternatively, select the files that you want to add, click the three dots icon next to the name of the shared collection and select “Add Selected Files“.
How to remove files from the shared collection
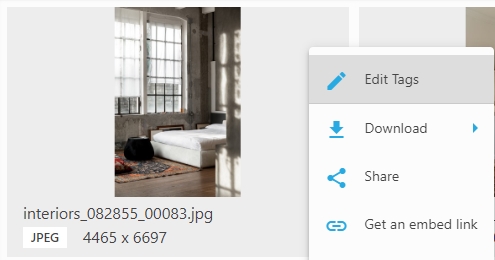
To remove one or multiple files from a shared collection, display the contents of the shared collection in the thumbnail area, select one or multiple files, then hover your mouse over one of the thumbnails, click ![]() icon, and select Edit Tags.
icon, and select Edit Tags.
In the panel that opens, display Shared Collection as a tag via ![]() icon, then hover your mouse over the name of the shared collection and click the
icon, then hover your mouse over the name of the shared collection and click the ![]() icon.
icon.

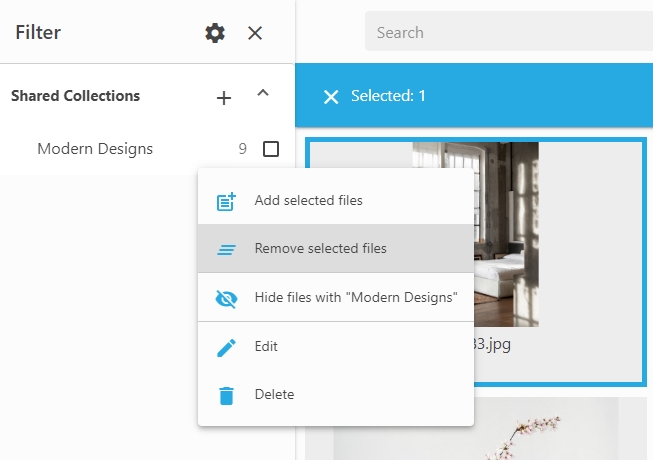
Alternatively, display the Shared Collection tag in the Filters panel, select the files that you want to remove, click the three dots icon next to the name of the shared collection and select “Remove Selected Files“.
Notes:
- To share your collections outside your LAN, make sure that your web catalog is publicly accessible by external IP address. Make sure to properly configure your Daminion Local server or install Daminion on a Windows-based web hosting. Alternatively use Daminion Cloud version.
- Administrators can access and manage all shared collections.
- Editors have access only to private shared collections created by them.
- By default, Viewers and Guests cannot create Shared collections within Daminion.