Tagging in Web Client
Creating new tags in the Filters panel
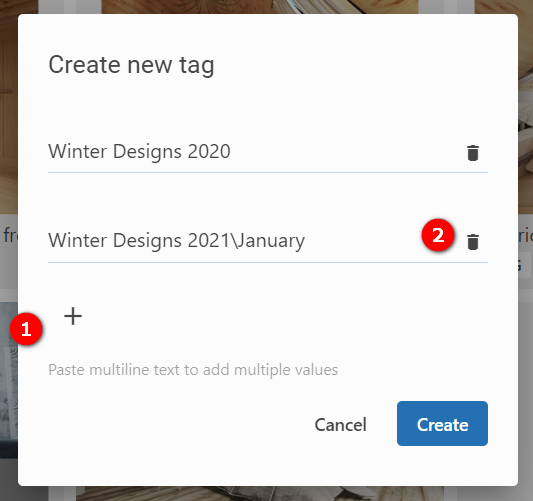
To create new tag values in the web catalog, click on the tag to expand it and then click on the + icon.

In the window that opens, enter a new tag value in the entry box and click Create.
If you want to create multiple tags at the same time, click the plus icon. The tag can be deleted by clicking the bin icon. To create hierarchy, use backslash “\”.
Note: the tag values created in the Filters panel are automatically suggested for use when tagging in the Properties panel or Tag editor.
To create sub-tags under the existing tag, hover your mouse over the tag to display the three dots icon next to it.
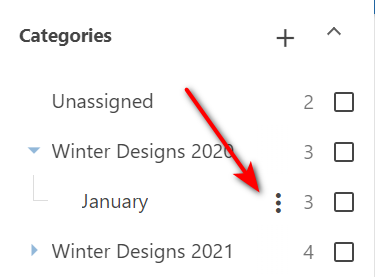
Click the three dots icon and select “Add”.
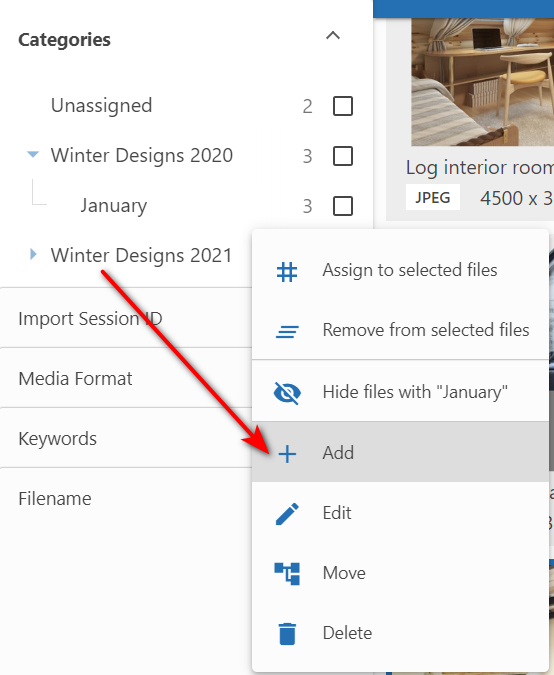
In the window that opens, create new sub-tags.
You can use the same menu to edit tag, delete them, or change the parent tag.
Drag’n’Drop Tagging in the Filters Panel
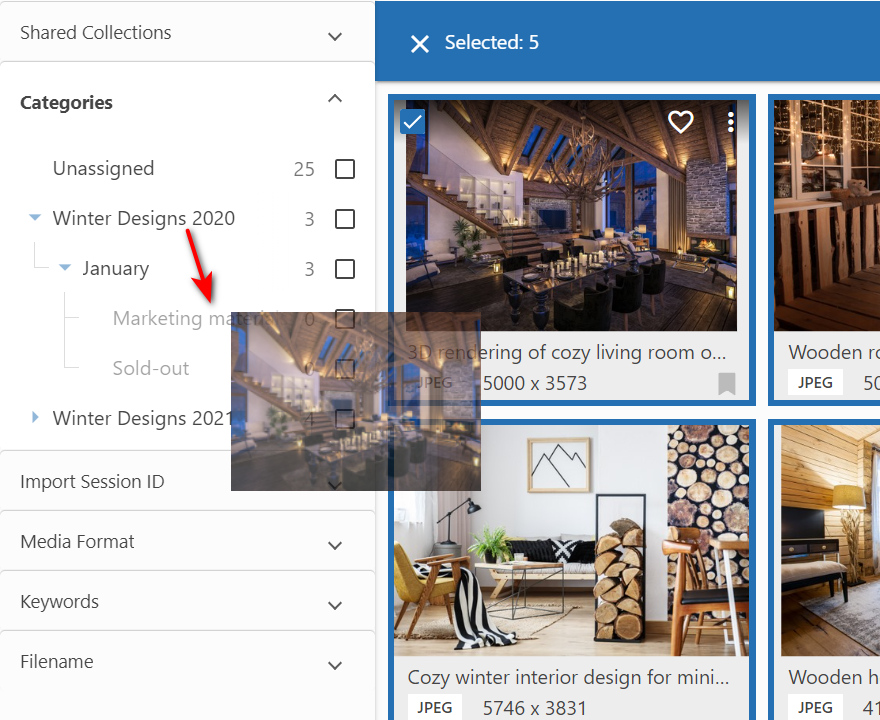
Select one or multiple files in the thumbnails area, hold down the left mouse button, and drag and drop the files onto the tag as shown on the screenshot below.
Alternatively, select the files in the thumbnails area, click the three dots icon next to the tag value you want to assign and select “Assign to Selected Files”.

Tagging in the Properties Panel
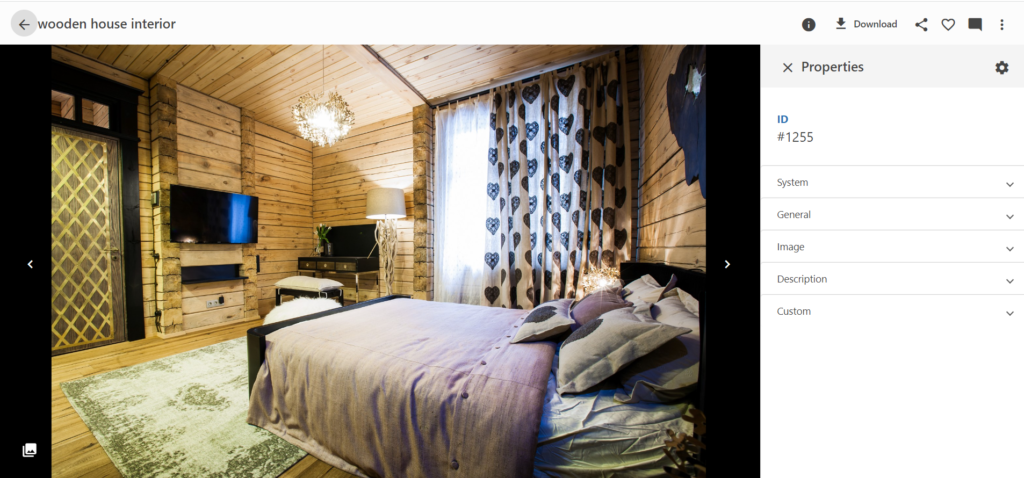
In the thumbnails area, click the image you want to tag to open it in full screen. Click the ![]() icon in the upper right-hand corner to display the Properties panel.
icon in the upper right-hand corner to display the Properties panel.
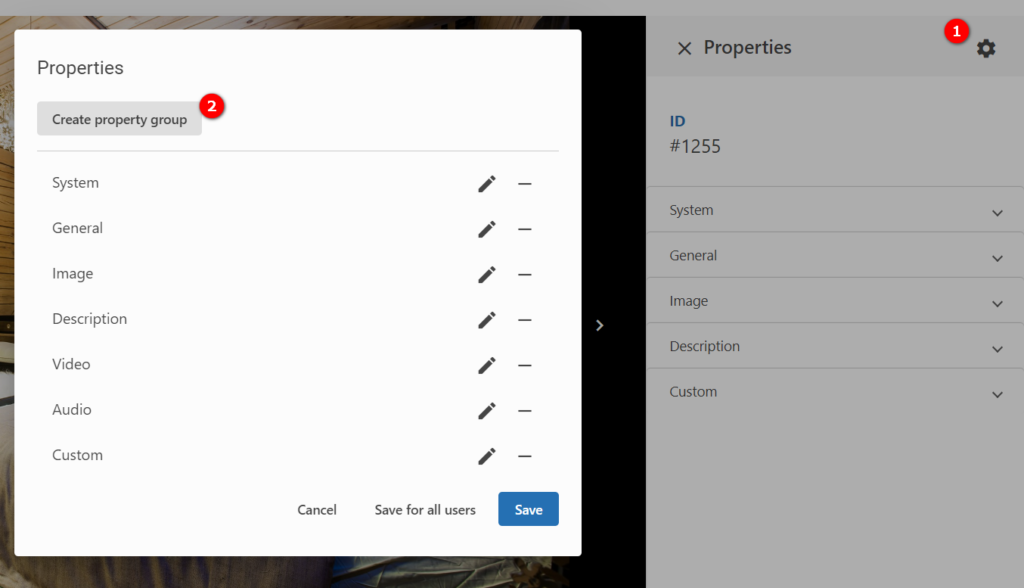
The tags displayed in the Properties panel can be customized by clicking the gear icon. Here you can create new Properties groups or rearrange the existing ones.
Note that starting with Daminion 7.7, the availability of tags in the Properties panel is regulated by the role-based Tag Access Restrictions. If some tags are not available for you, please contact Daminion Administrators!
To assign tags to a file, expand the tag and start typing the tag name.
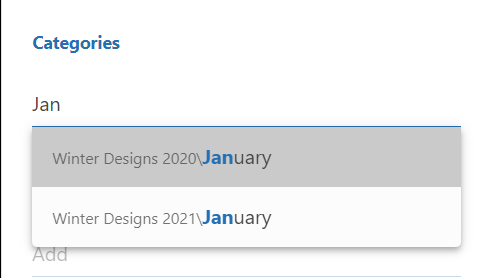
If the tag already exists, Daminion will suggest using it. If the tag does not exist yet, you can create it and assign it at the same time. 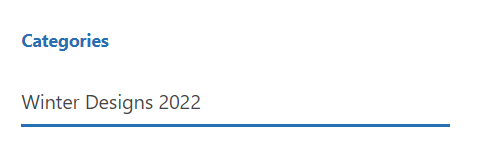
Hierarchical tags are created in the same way as in the Fillters panel – each hierarchy level is delimited by a backslash “\” and multiple tag values are separated by commas.
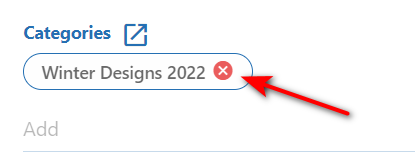
To delete a tag from the file, hover the mouse pointer over it and click the X icon.
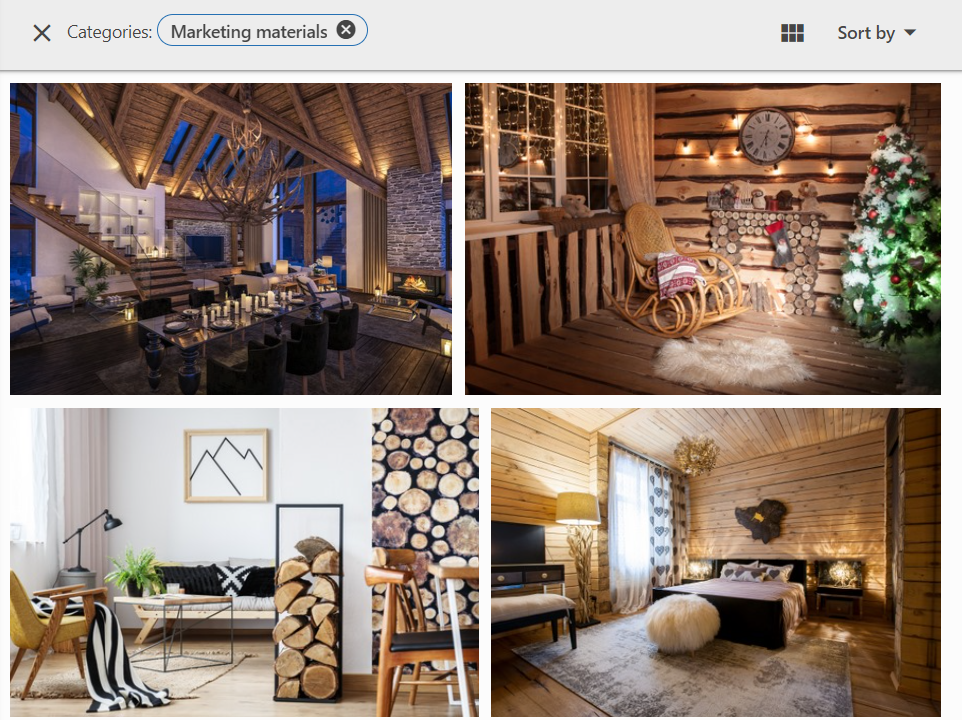
Click the ![]() icon to display all files that share the same set of tags.
icon to display all files that share the same set of tags.
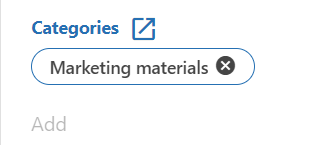
And here’s the result:
Note: In the Properties panel, tags cannot be assigned to more than one file at the same time. To assign multiple tags to multiple files at the same time, use Tag Editor.
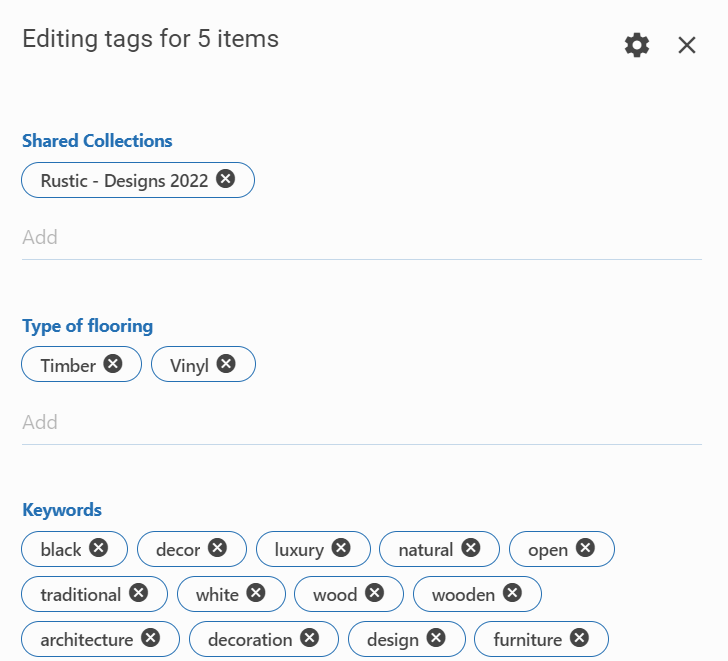
Tag Editor
The Tag Editor allows you to assign tags to multiple files at the same time.
To open the Tag Editor, select one or more files in the thumbnails area, click the three dots icon on the toolbar, and select Edit Tags.
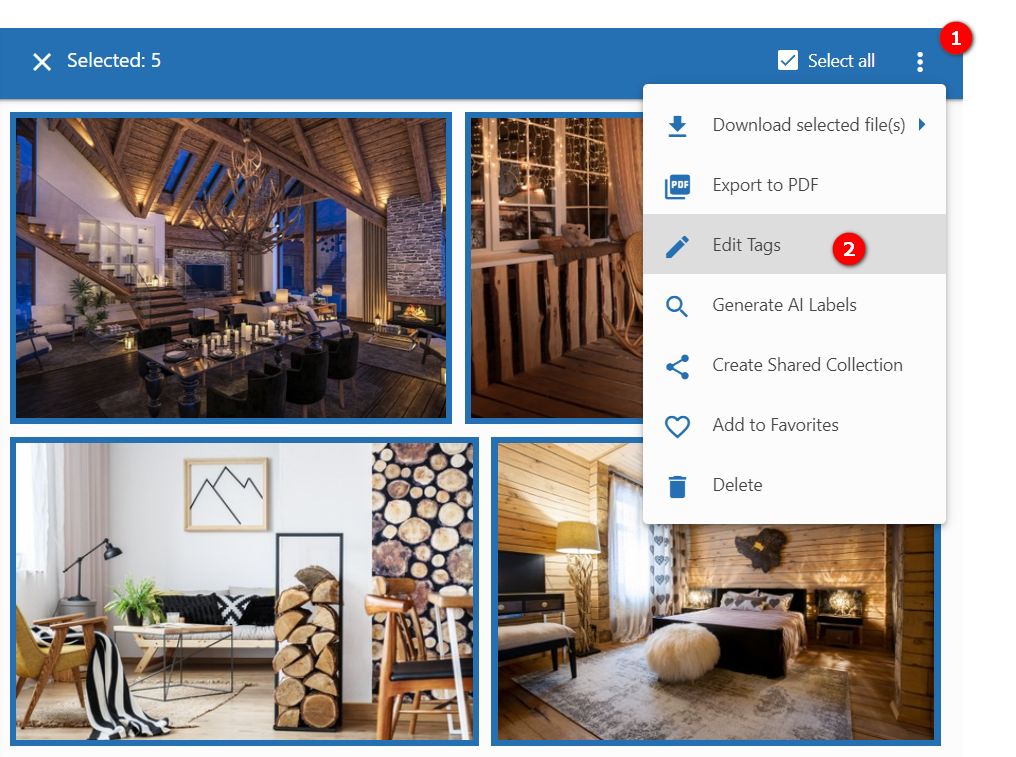
Alternatively, select the same option by clicking the three dots icon on one of the thumbnails.
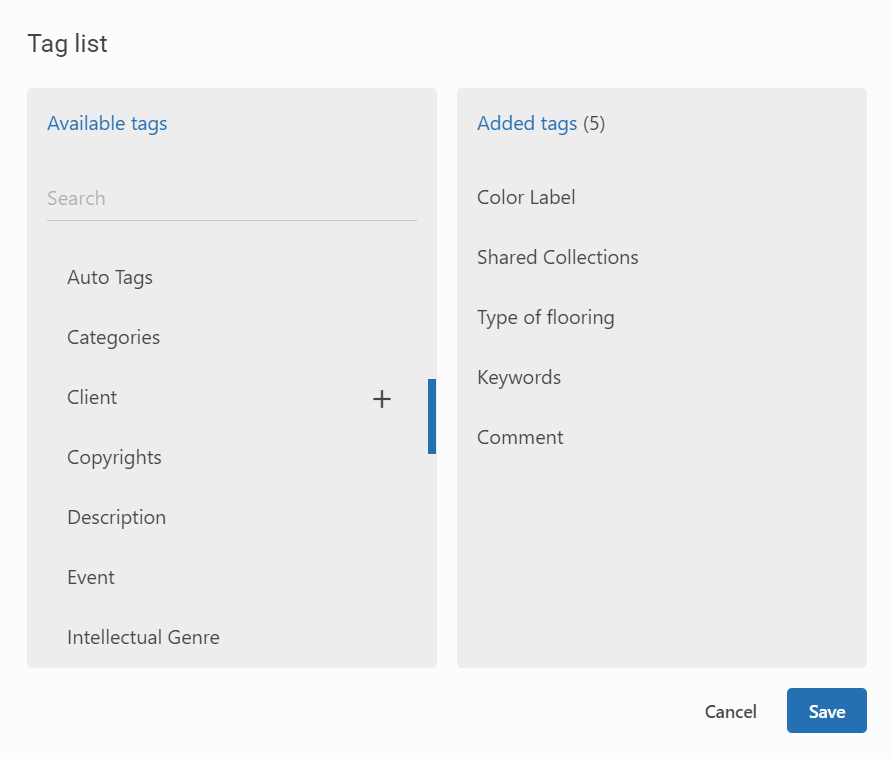
In the window that opens, you can customize the displayed tags by clicking the gear icon.
This is what the list of available and displayed tags looks like:
Note that starting with Daminion 7.7, the availability of tags in the Edit Tags is regulated by the role-based Tag Access Restrictions. If some tags are not available for you, please contact Daminion Administrators!
If selected files already have assigned tags, these tags will be displayed: for multi-value tags, all tags values assigned to all files will be displayed; for single-value tags, only common values will be displayed.

Tags are created and assigned just like in the Properties panel:
- Use comma to create/assign multiple tag values at once;
- Use backslash “\” to create and assign a hierarchical tag;
- If the tag already exists, Daminion will suggest using it;
- Added tags are save automatically.