
This scheme is an enhanced version of Scheme A, but performance is better because the Documents are stored on the same computer as the Daminion Server
Pros:
- Performs well when importing files, viewing images, and updating metadata.
- It’s possible for MacOS or Linux-based computers to have access to shared files on remote network locations.
Cons:
- The Version Control feature is disabled for all shared files in all old versions (4.1 and lower).
Note: To protect your video files from accidental “screw-ups” when using Windows Explorer or any other file explorer please change permission settings for folders where video files are stored:
1. Assign Read-Only access to Everyone.
2. Assign Read/Write access Daminion Server service account user.
Recommendations:
- Share folders that contain videos, then import them using network paths, for example: “\\mediaserver\videos\…” using the “Add Files without copying to server” option. This allows you to watch videos without having to download them to a client’s computer.
- For optimum performance, we recommend you install Daminion Server on a computer with a minimum of 16 GB RAM, an i7, i9 (Xeon) processor, a separate hard disk with plenty of free space.
- Find all system requirements here.
SCHEME C. How to add an EXISTING media archive to Daminion Server
- Install Daminion Server on the same computer as your shared documents.
- If files are located on a NAS device, you can copy them to the shared folder on the server.
- Install Daminion Client on the same server computer and launch it.
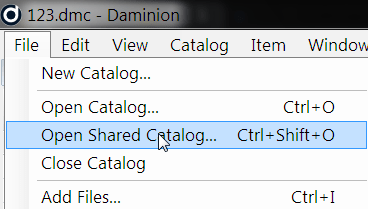
- Go to the File menu and navigate to the “Open Shared Catalog…” option.
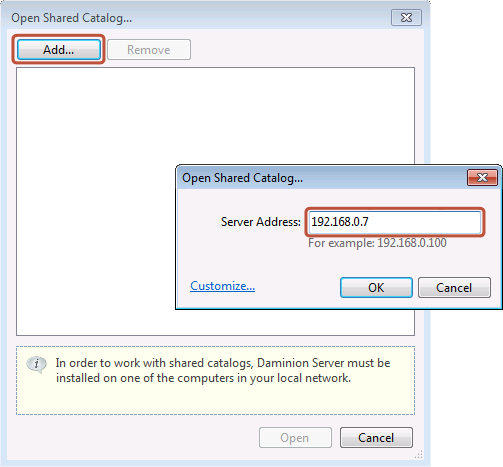
- Press the “Add” button and enter your server PC name or IP address, or simply type in “localhost” (without quotes).
You can get the server IP address from the Daminion Server Administration dashboard.
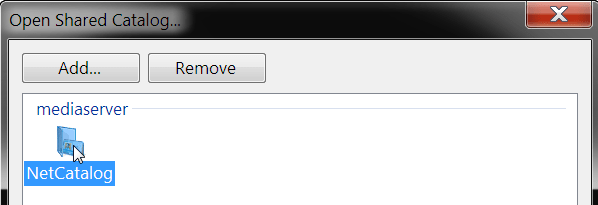
Double click on the catalog icon that appears.
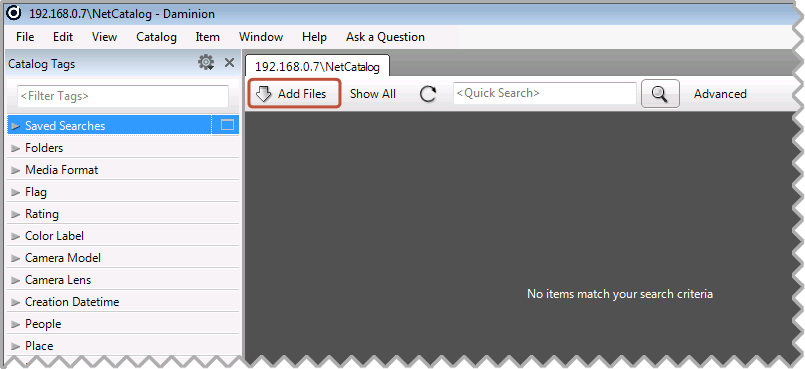
If everything’s OK, you’ll see an empty workspace will open with the name of your server or your IP address as the title in the tab at the top of the page. Click on the “Add Files” button and select the files to import into your Daminion Server.
Select the local folders that contain the documents on the Server PC (you can select multiple folders) and press the “Add” button.
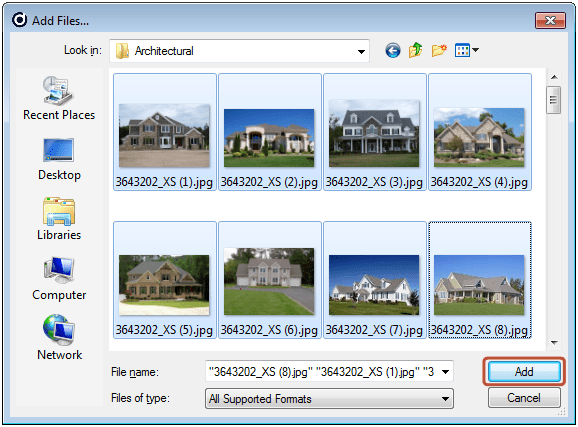
The Daminion Import window will appear. Select the “Add Files to catalog without copying” option to import files from this computer.
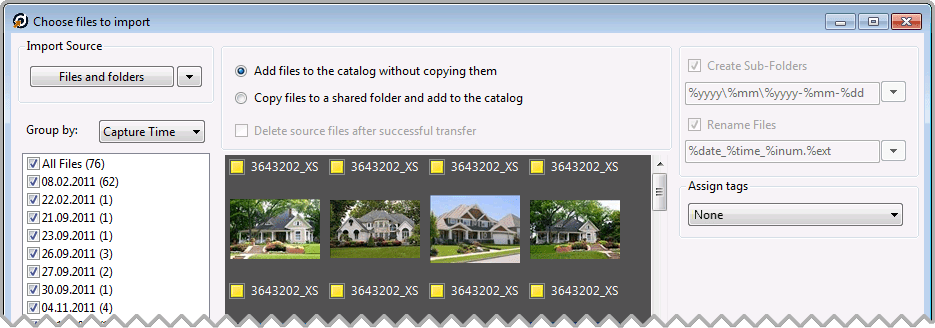
- Click on the “Import” button to add the selected files to Daminion Server. This takes some time, but you can start working with Daminion Client while the files are being imported because the import process runs in the background.
- When the import is complete all your documents, with their descriptions, will be visible to other Daminion Clients connected to the Daminion Server.
SCHEME C. How to add NEW files to Daminion Server
Any Daminion Client connected to your local network can add new files to the Daminion Server.
- Launch a Daminion Client, open a shared catalog and click on the “Add Files” button.
- Select the files you want to import. These files can be from a flashcard or a local folder.
- Check the “Copy files to a shared folder…” option.
- Specify your network destination folder in the panel on the right.
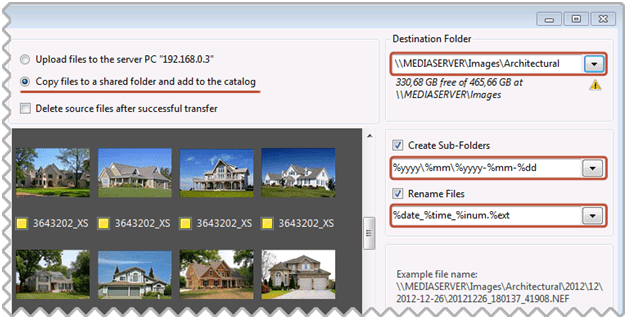
- Specify file/sub-folder naming rules
- Click on the “Import” button
Now all files from the local computer will be copied to shared folders on the server computer and added to Daminion Server. In the Daminion Server Administration Panel, you can specify a server-based folder where the uploaded files will be stored.