You can assign color labels to your files to make them easier to visually distinguish, sort, or to track their status in your workflow.
Daminion provides 9 pre-defined colors that you can select from. By default, labels are named after the name of the particular color, but you can change these names to whatever you prefer.
In addition to the default 9 colors, you can create more color labels by clicking on the header “Color Label” in the Tags panel and pressing the [Ins] key. These newly created color labels will be automatically assigned a gray color. In the current version of Daminion, it is not possible to assign a custom color from the palette.
Assign a Color Label
There are various ways to assign a color label. You can do it on a Thumbnail Preview, in the Tags panel, in the Properties panel, via the File Menu, or by using a corresponding keyboard shortcut.
Assign a Color Label on a Thumbnail Preview
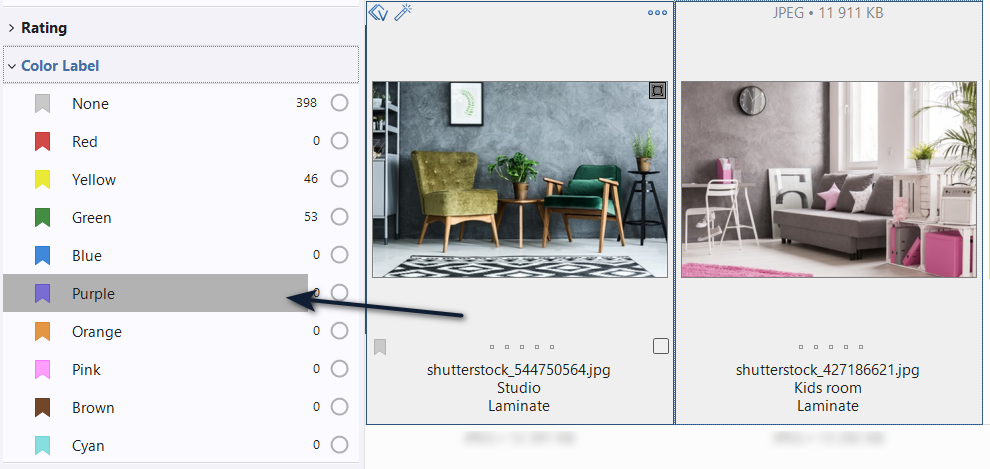
To assign a color label, left-click on the color label icon located below the thumbnail on the left. This opens a dropdown list from which you can select the color you want.
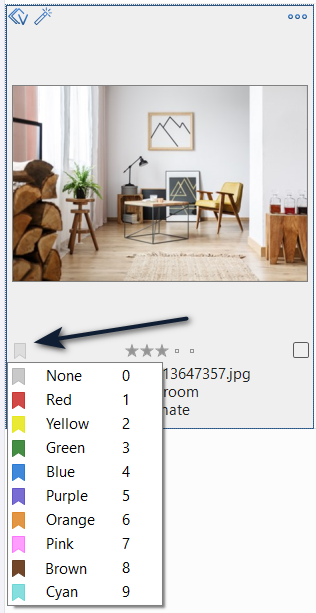
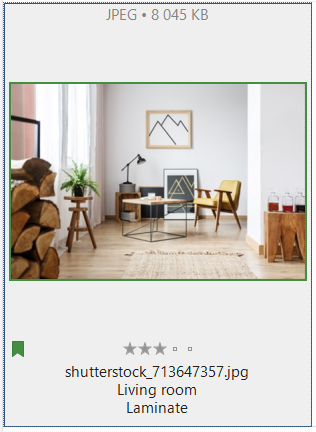
Alternatively, you can simply press the appropriate number on the keyboard number pad, where 1 to 9 assign the preset colors, and zero assigns none (as shown in the screenshot above). After you make your selection, the image frame and the tag icon will change to your chosen color.
Assign a Color Label in the Properties panel
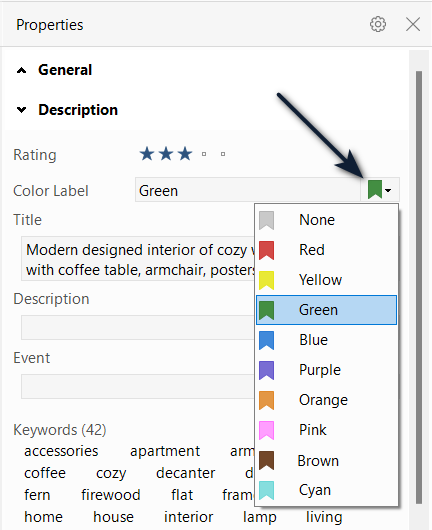
To assign a color label in the Properties panel, select an item in the Browser Window. Then in the Properties panel, expand the Description tab and select the color you want from the drop-down list of the Color Labels .
Assign a Color Label in the Tags panel
To assign a color label, navigate to the Tags panel on the left side of the screen, and click the little triangle next to “Color Label” to expand the list. On the right, you will see the number of images that each color has been assigned to. Next, select one or more items in the Browser Window and drag and drop them onto the respective color in the Tags panel.
Changing the names of the Color Labels
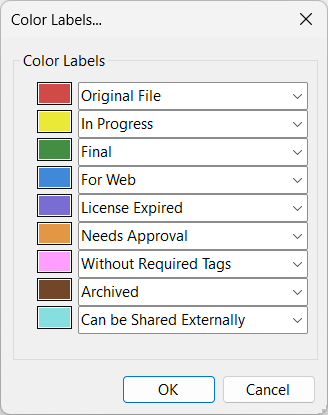
You can easily change the names of the color labels to suit your workflow. For instance, you may want to associate certain colors with specific stages in your process, such as red for “Original File,” yellow for “In Progress,” and green for “Final.” By using color labels in this way, you can quickly determine the status of each image in your workflow at a glance.
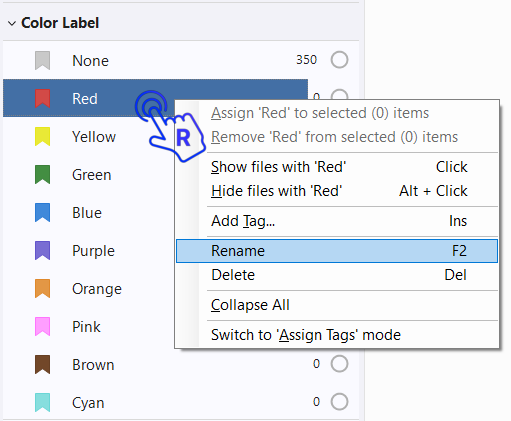
To change the name of a color label, follow these steps:
- Click on the “Color Label” header in the Tags panel to open the list of color labels.
- Right-click on the color label you want to change and select “Rename.”
- Enter the new name for the color label and press “Enter” to save the changes.
After changing the name of the color label, it will appear with the new name in the Tags panel, making it easy to identify and assign to your files.
Alternatively, you can specify your own color names in the File menu via Catalog > Color Labels.
In the Color Labels window, you can replace the existing color names with names of your own.