Daminion allows you to create your own custom tags in the web client so that you can address your tagging requirements more precisely.
To create a new custom tag, log into your catalog as an administrator, click the three dots icon in the upper right corner of the web client interface, and select Settings.

In the window that opens, click Custom tag settings.
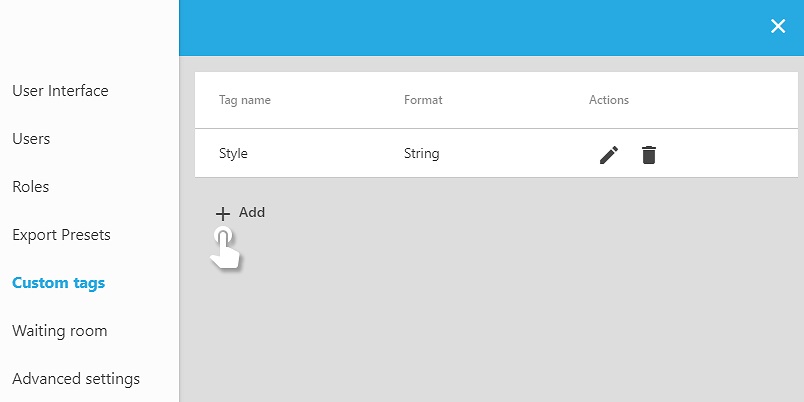
In the next window that opens, click the Add custom tags button to open the following dialog window.
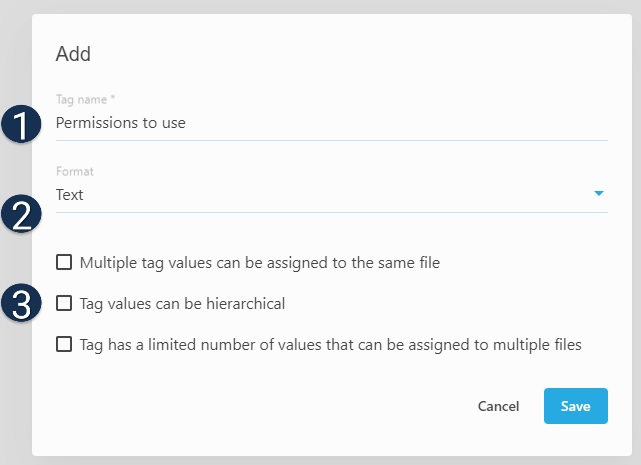
![]() Enter the Tag name. In our case, it is “Permissions to use”
Enter the Tag name. In our case, it is “Permissions to use”
![]() Select the type of custom tag you want from the drop-down menu by clicking the small down arrow icon. You can select from the following: Text, Fractional, Integer, Time, Currency and Link
Select the type of custom tag you want from the drop-down menu by clicking the small down arrow icon. You can select from the following: Text, Fractional, Integer, Time, Currency and Link

![]() If the String type is selected, you will need to define the following parameters of your custom tag:
If the String type is selected, you will need to define the following parameters of your custom tag:
– Multiple values can be assigned to the same file
– Tag values can be hierarchical
– Tag has a limited number of values that can be assigned to multiple files
If at least one of the parameters is selected, the custom tag will be displayed in the Filter panel. If none of the parameters are selected, the custom tag will only be available in the Properties panel.
Click the Create button to create your custom tag, close the Settings window, and refresh your browser view.
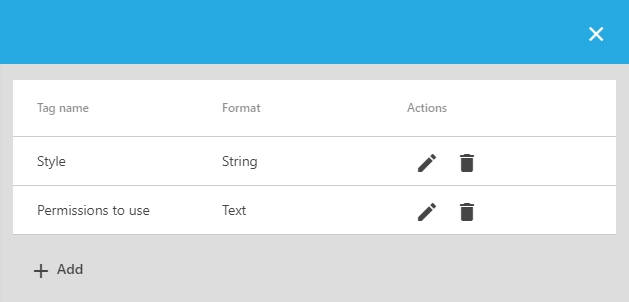
Please note that Custom Tags can be written to the metadata of the files. Starting with version 7.0 Custom tags can be renamed after being created. However, the name will be only changed in Daminion interface and will not be changed in the metadata of the file. Therefore, please be sure about the name of the custom tag before creating it.
To rename a custom click, right-click it and select “Rename”.
How to assign custom tags
By default, newly created custom tags are not displayed in the Filter panel. Click ![]() on the Filter panel.
on the Filter panel.
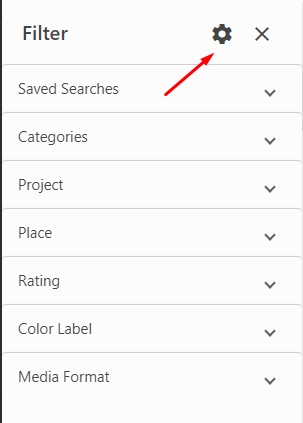
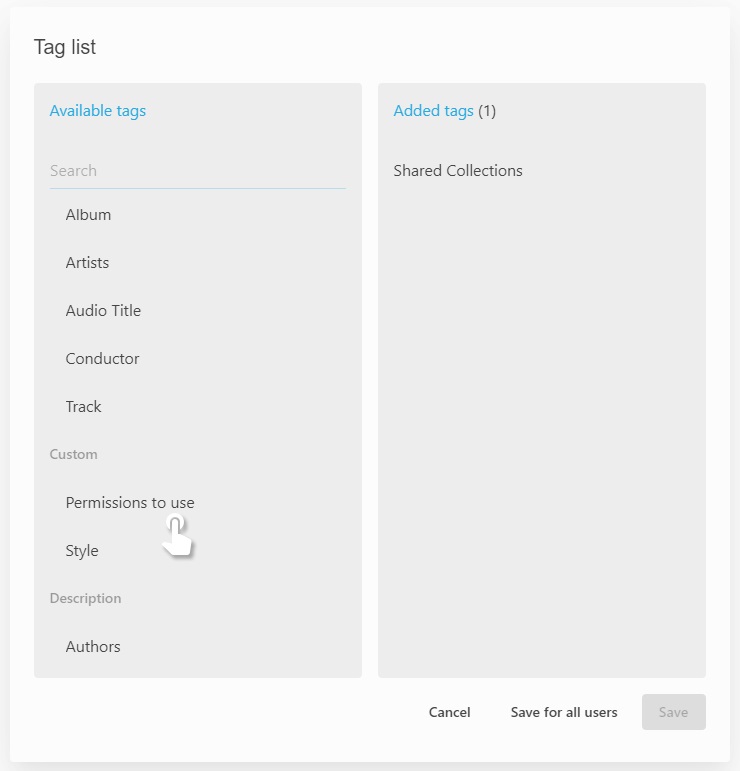
The created tag will be available in the custom category. Click the + icon or drag the desired tag into the column on the right and click “Save” to display the tag in the Filter panel.
Create new tags under your custom tags by clicking the plus icon in the Filters panel.
Learn more about how to create and assign new tags here.
