Face Recognition 2.0 is available in Daminion Server v 7.9 or higher!
Note: All images used in this article are purchased on Shutterstock.
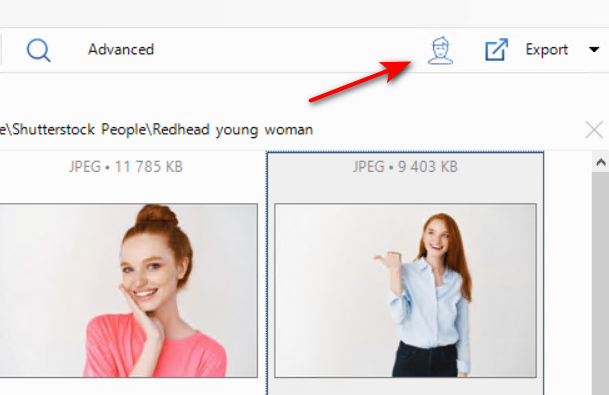
To start working with Face Recognition, follow this instruction on how to install the Face Recognition module. Once installed, open the Daminion desktop client and click on ![]() . This icon is located in the upper right corner of the interface as shown on the screenshot below:
. This icon is located in the upper right corner of the interface as shown on the screenshot below:
All files added to the catalog are automatically analyzed and similar faces are grouped together.
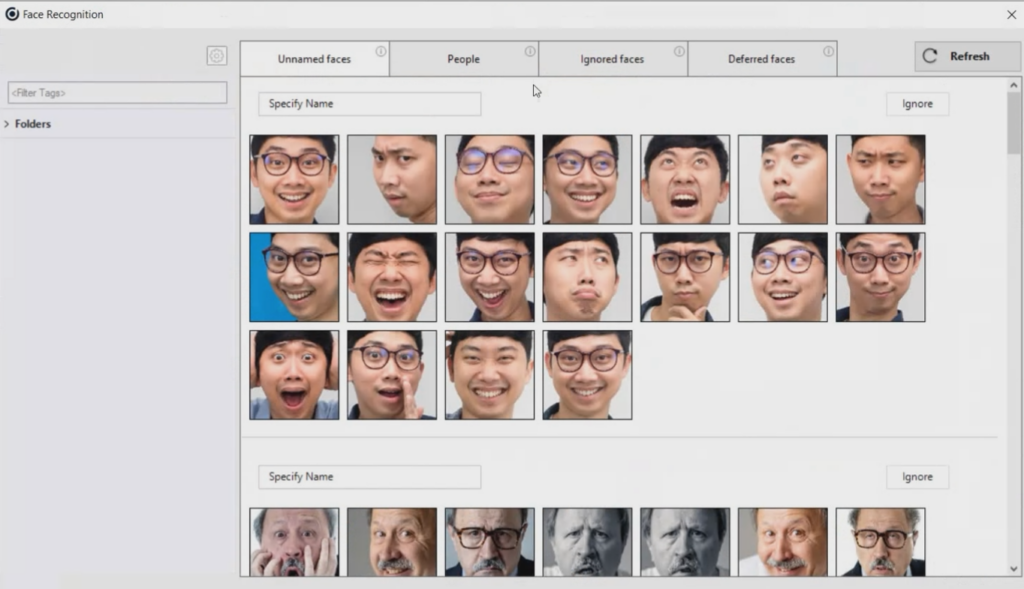
Giving a name to a group of faces
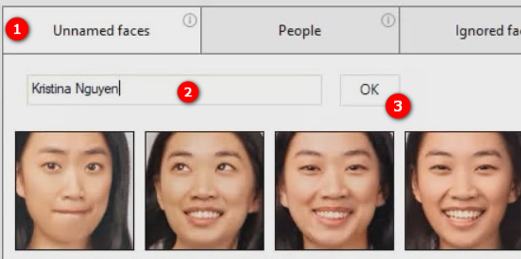
To assign a name to a group of face, click Unnamed faces, type in the name in the “Specify Name” bar and click OK.
Once assigned, the name will be added to the list of People.
Now, Daminion will automatically suggest this name for similar faces with an option to confirm or reject the suggestion.
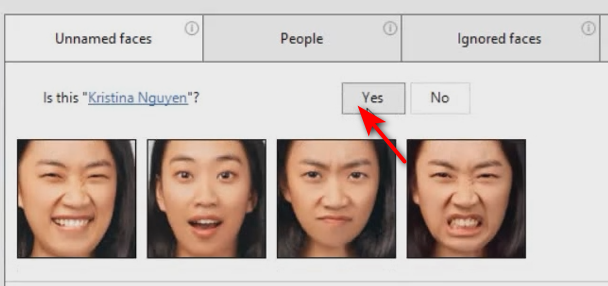
If you click No, the Specify Name bar will appear.
Deferring or ignoring faces
You can defer faces to describe them later or ignore faces that are unlikely to be described any time soon.
To defer faces, select one face in the group or multiple faces by holding down the CTRL key, click on the three dots icon on a face thumbnail and select Defer.
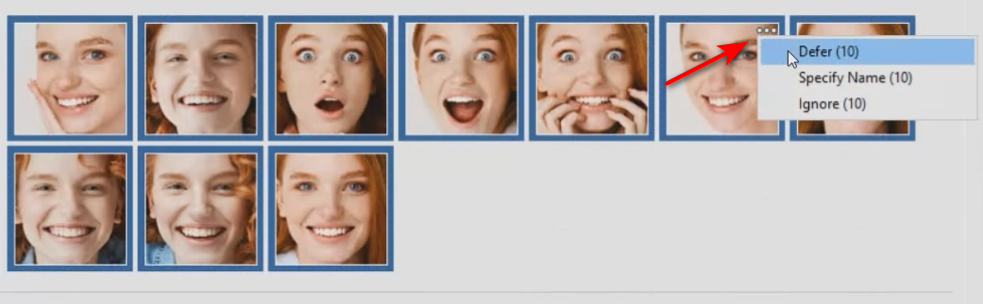
In the same way, you can Ignore one or multiple faces, or Ignore the whole group.

Accessing the deferred and ignored faces
The deferred and ignored faces can be accessed by clicking the Deferred and Ignored tabs respectively.
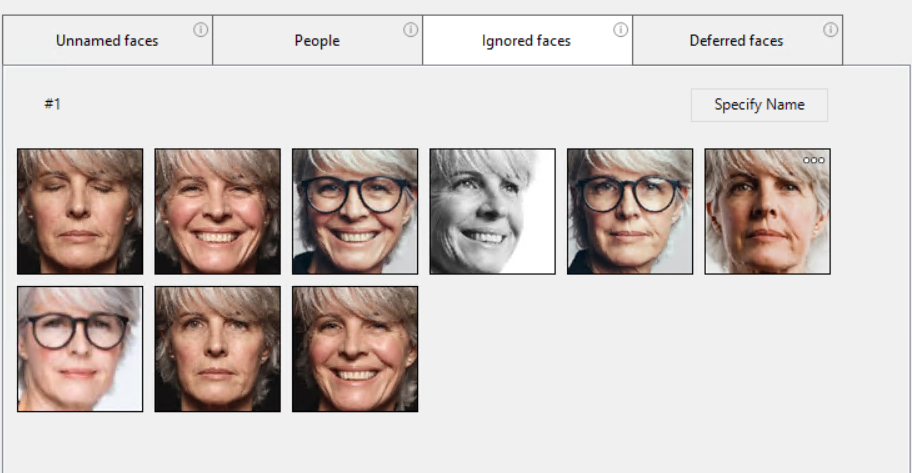
Here you can assign a name to a few faces or an entire group of faces.
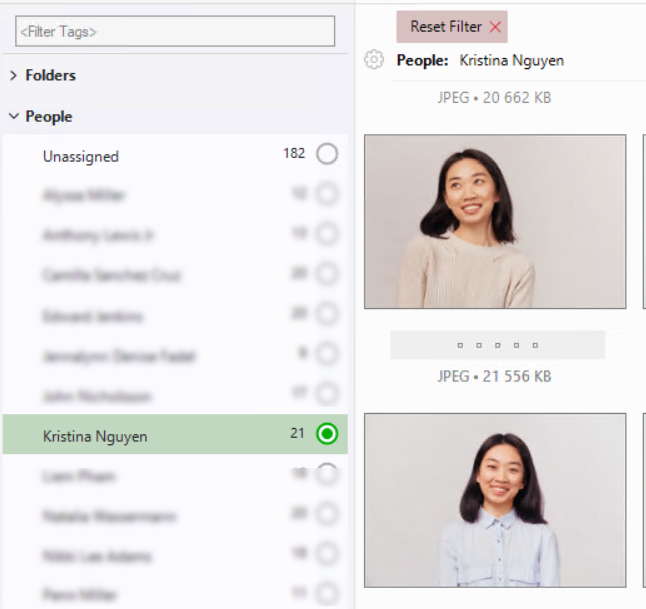
Managing faces with assigned names
All faces associated with names can be accessed in the People tab.
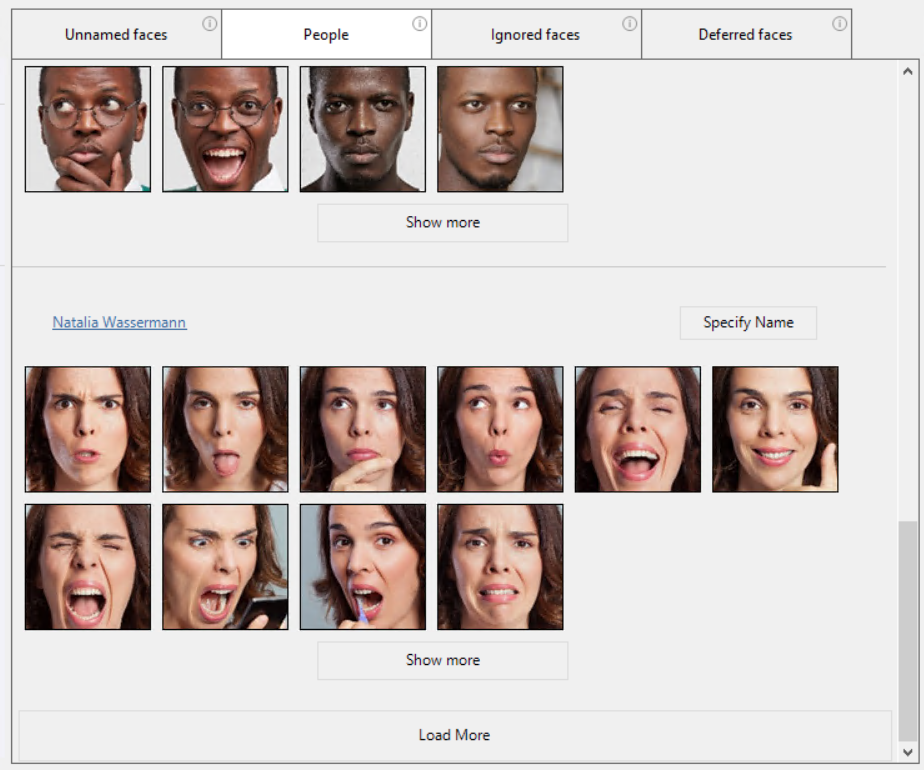
You can scroll down to Load More groups or click on Show more to display all faces assigned to particular name.
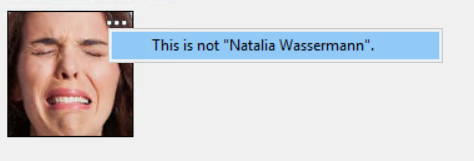
Mistakenly assigned faces can be removed from the group and returned back to Unnamed faced by clicking the three dots icon on the face thumbnail and selecting “This is not NAME”
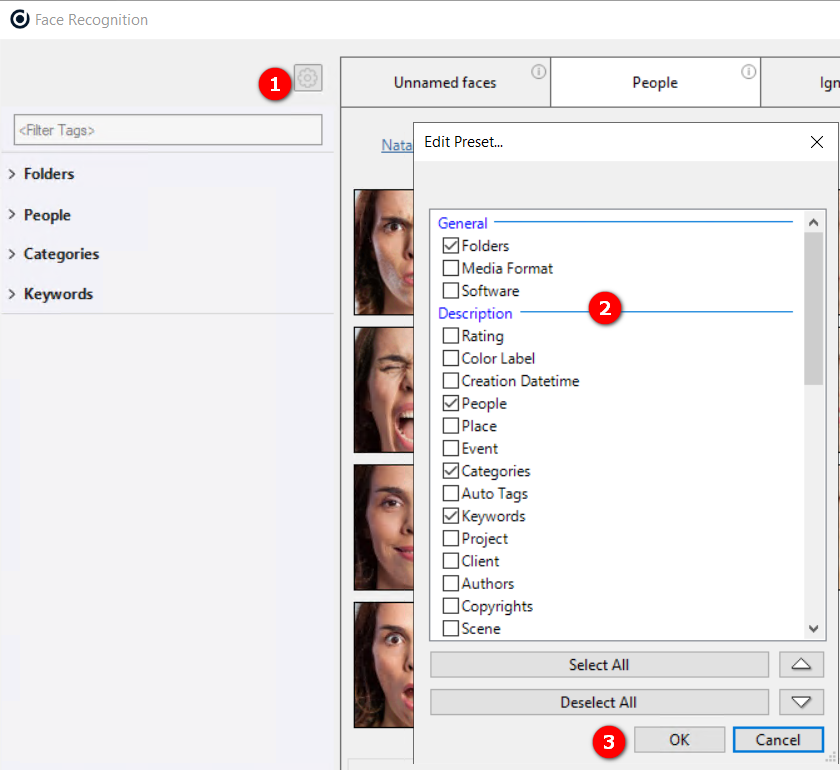
Filtering
Filtering can save you a great deal of time when searching for a group of faces assigned to a particular name or trying to people tag all files coming from an event or taken on a certain date.
To display filters relevant to your workflow, click on the gear icon and check the tag checkboxes.
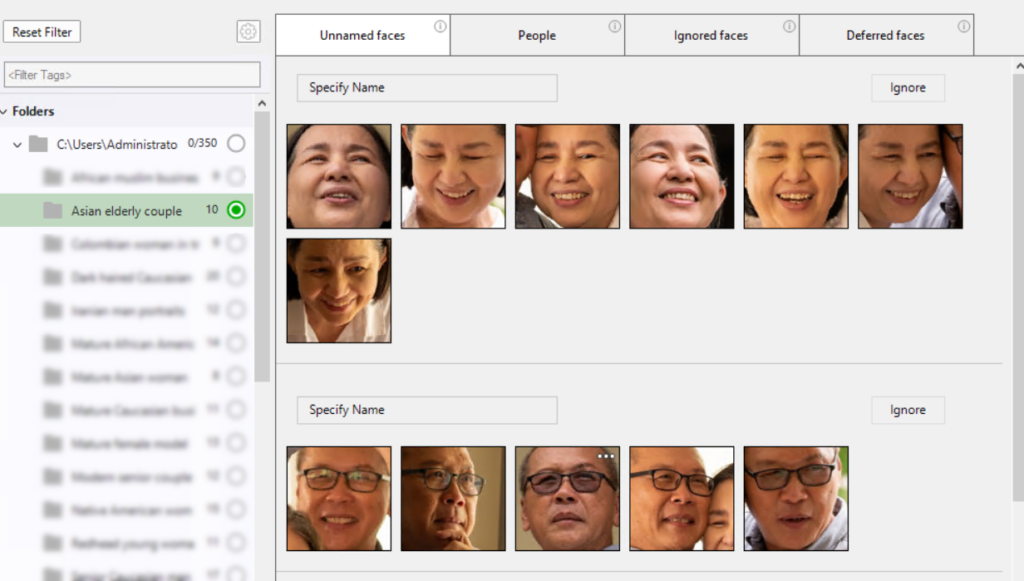
Now, select a folder (or any other tag) and switch between the Face Recognition tabs to see the cross-search results.
Thus, all files from the “Asian elderly couple” folder are now listed in Unnamed faces and ready to be tagged.
Checking the source image before assigning a name
Sometimes seeing what picture the face thumbnail is coming from can help you assign a person’s name correctly.
To open the source image, double click on the face thumbnail. The image will be opened in full screen with a rectangle around the face.
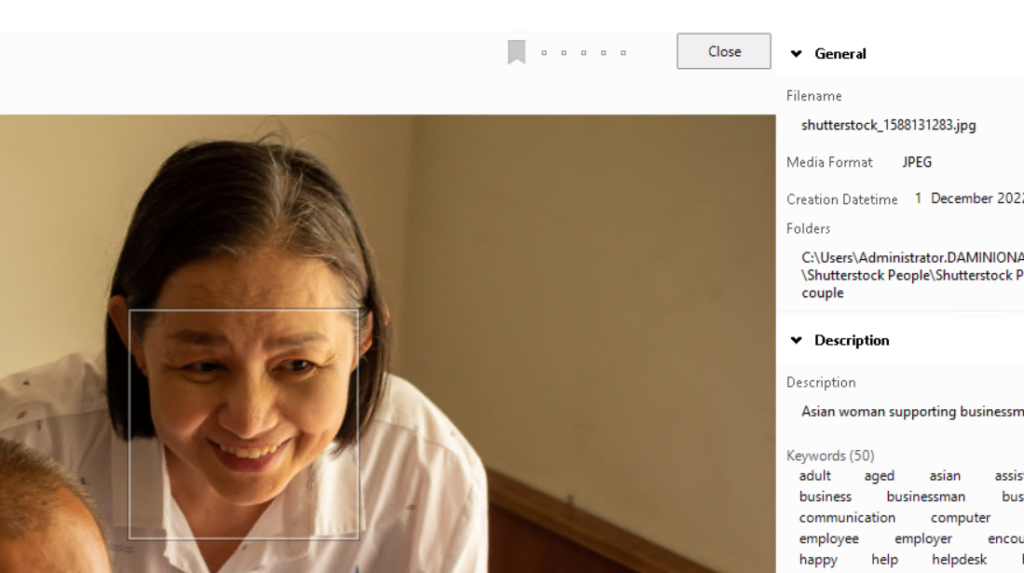
This action works in all four tabs: Unnamed faces, People, Ignored faces, and Deferred faces.
Clearing information about Faces and processing them again
Low-res images may give poor recognition results if the image previews are resized before being processed by Face Recognition. You may want to remove this setting in Daminion Server Administration panel, restart Daminion Server, and process the images again.
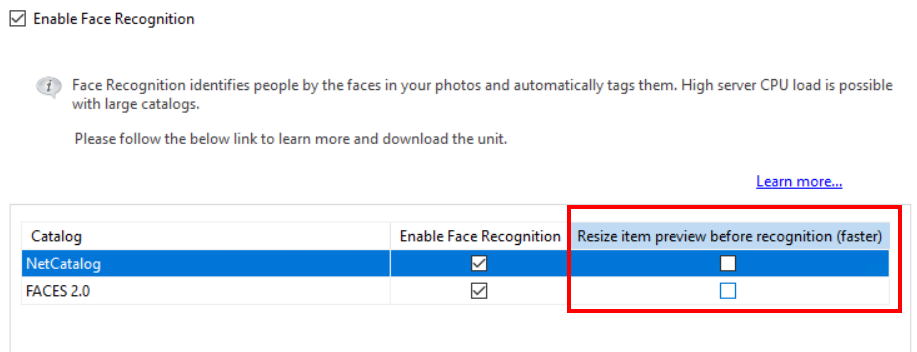
To send images to be processed by Face Recognition again, select images in the thumbnails area, right-click on them, navigate to “Actions” and select “Clear information about faces and process again”. Once processed, the faces will be displayed in the “Unnamed faces” tab.
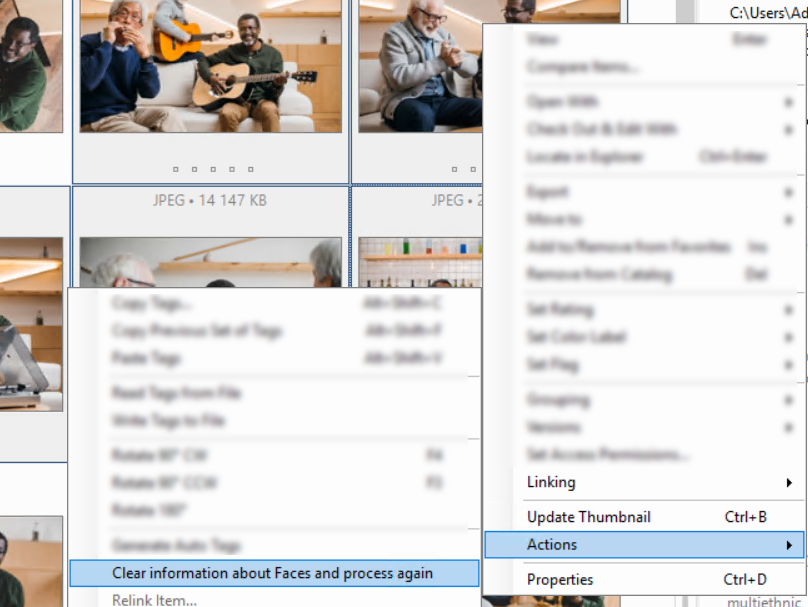
Confirm the process by clicking OK.
![]()
Starting with version 10.5, an improved recognition process is available. Check the box if you want the image to be processed with increased resolution, which allows small faces (less than 80×80 pixels) to be recognized.
Warning: this process is very demanding of system resources! Memory consumption on the server can reach 10 GB. Use with caution.
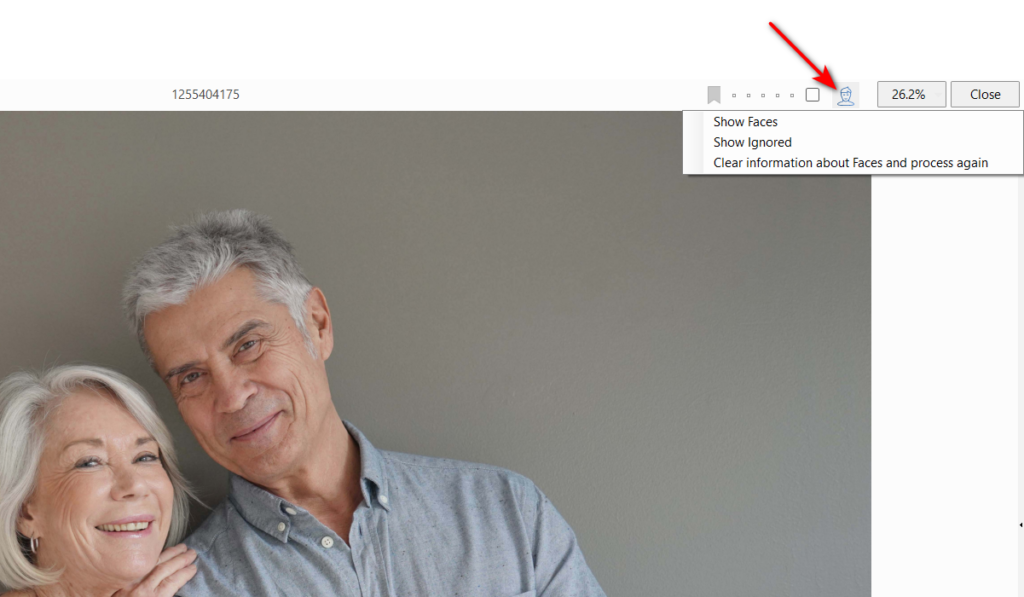
Tagging multiple people in a single image in full screen
Open an image in full screen and click on the ![]() icon. This action shows a drop-down menu with the following options:
icon. This action shows a drop-down menu with the following options:
Show Faces – Shows a frame around the detected faces.
Show Ignored – Shows the faces that were ignored. By default, these faces are not displayed.
Clear information about Faces and process again – Clears the information about the faces found in the image and sends it back for detection.
The ![]() icon can indicate the following state of the image:
icon can indicate the following state of the image:
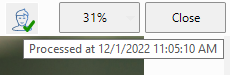 Image was processed by Face Recognition
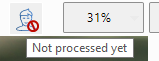 Image is not processed yet.
The Face Caption
The face caption color indicates the following:
Grey: The Face is not assigned to a name.

Click on the caption area of the frame to type in the name:

Orange: There is a name suggestion.

Green: A name is assigned to this face.