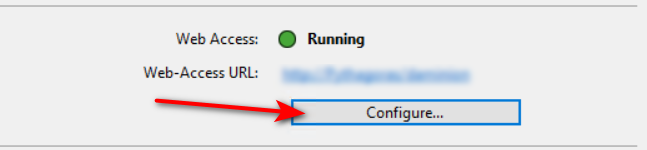
To start working with Daminion Connector for MS Office, open Daminion Server Administration panel and click on Web Access > Configure.
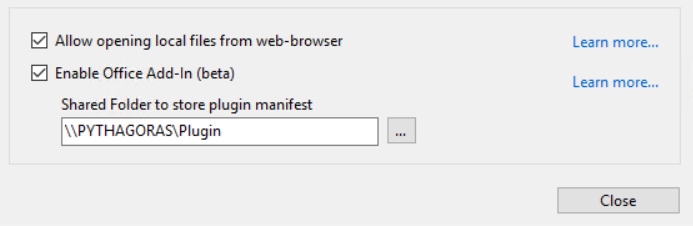
In the window that opens, check a checkbox “Enable Office Add-in” and point it to a shared folder to store a plugin manifest file. It can be a shared folder on Daminion Server PC or on any other machine in the network. The main condition is that anyone who will be using Daminion Connector should have access to this folder.
After that, open the web catalog, go to Settings > Integrations. 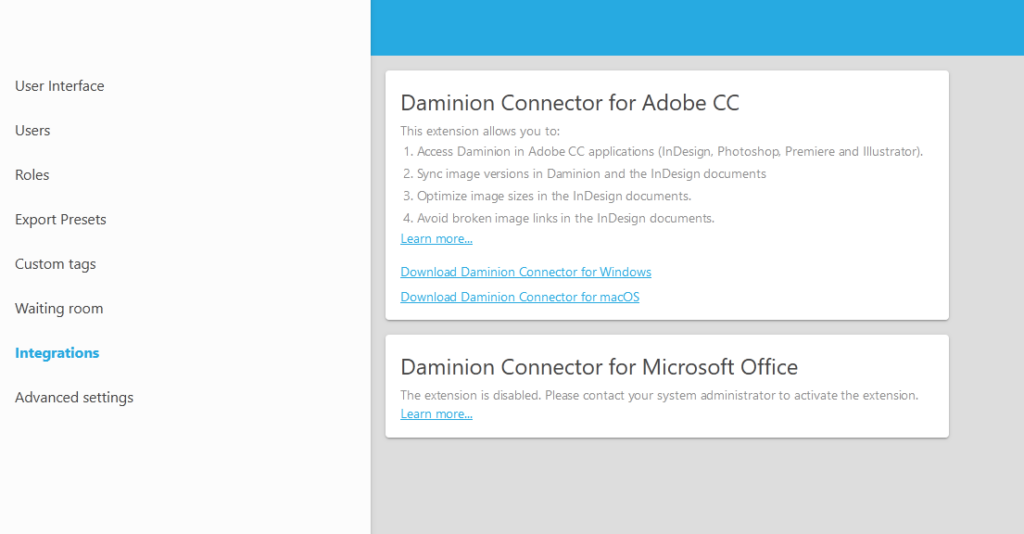
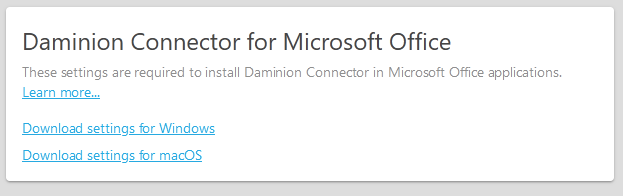
By default, Daminion Connector is disabled. Once activated via the Daminion Server Administration panel as described above, the download links for Windows and macOS will appear.
Note: The manifest/reg file will contain a path to the server with the plugin. The path will reflect the URL address that is used to connect to the catalog. For example, if the manifest/reg file is download from “\192.168.1.10catalog…”, the Daminion Connector will work with the catalog opened at the same address.
Daminion Connector for MS Office: Setup on Windows
1 – Click on “Download settings for Windows” in the web client.
2 – An xml file will be generated in the shared folder specified to store the plugin manifest, and a .reg file will be downloaded. Run the .reg file and restart MS Office.
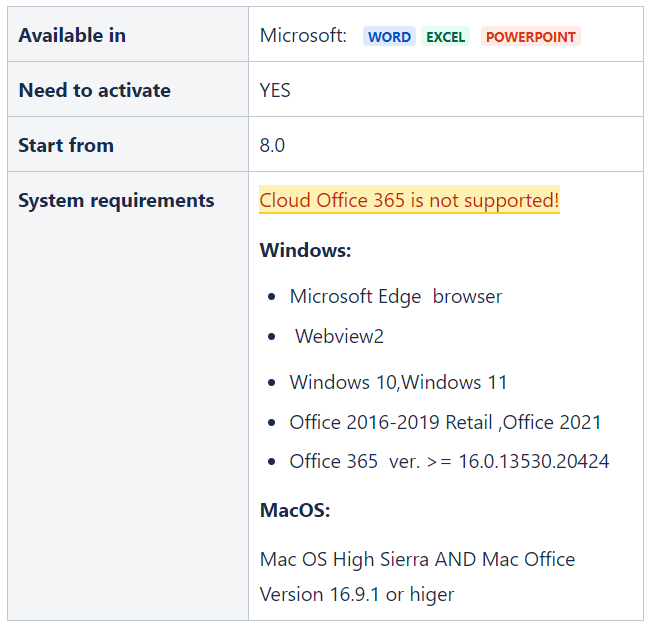
The following applications should be installed on your PC:
Check out Daminion Connector for Microsoft Office: Functionality to learn how to work with the plugin.
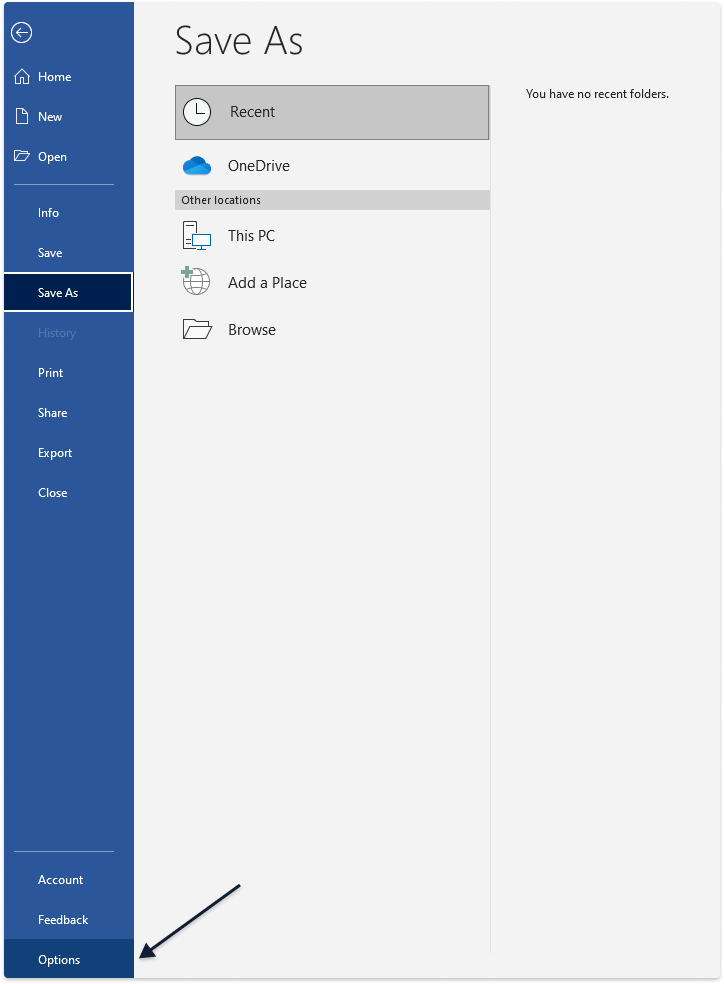
Daminion Connector for MS Office: Uninstall on Windows
To remove Daminion Connector, go to Microsoft Office Settings
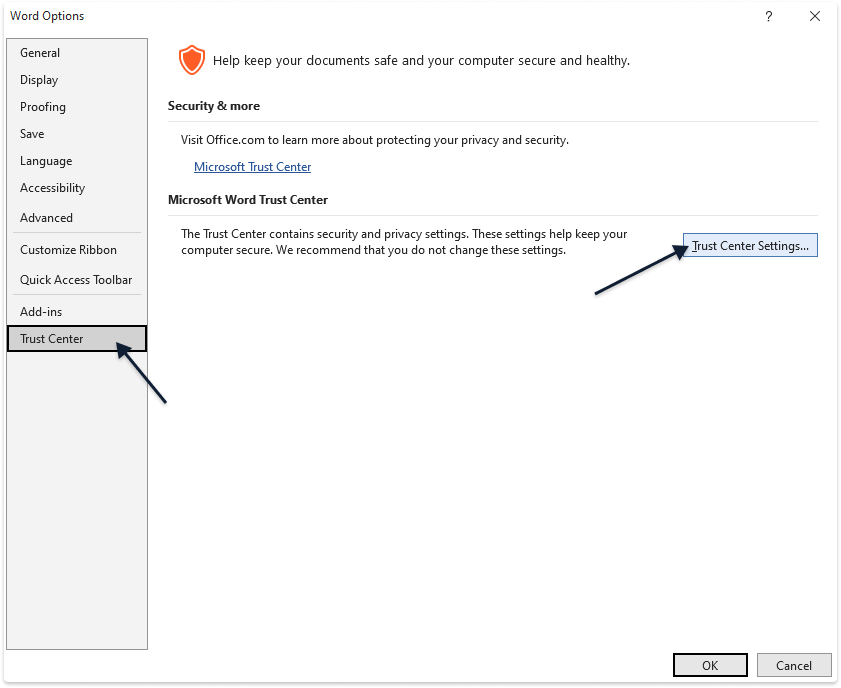
Choose Trust Center and then select Trust Center Settings
Next, select “Trusted Add-in Catalogs”.
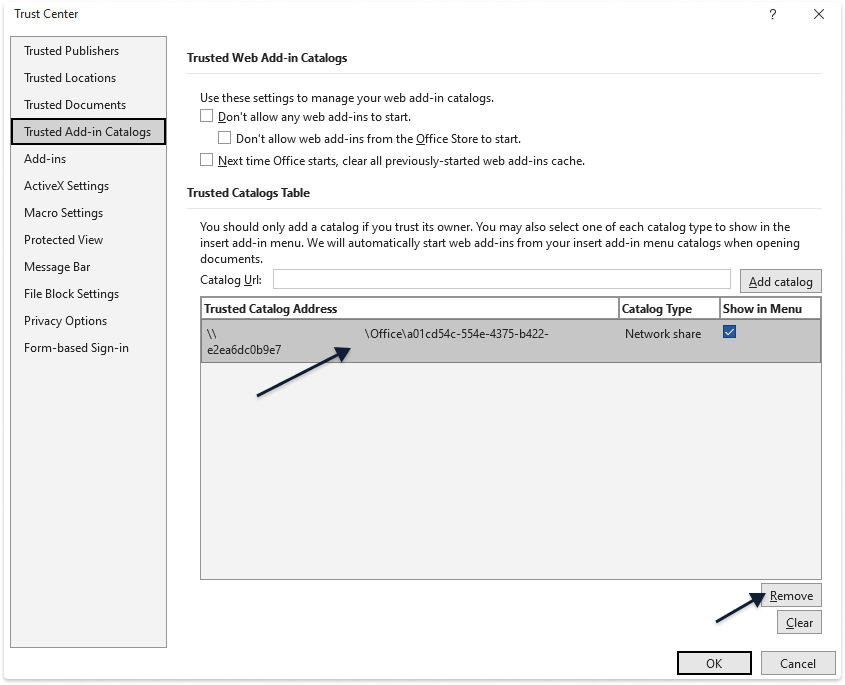
From the list, select the address of the directory that you have configured in the Administrative Tools and click Remove.
If you remove the address from one Microsoft product, it will also be removed from other products.
Daminion Connector for MS Office: Setup on macOS
1 – Click on “Download settings for macOS” in the web client.
2 – An xml file will be generated in the shared folder specified to store the plugin manifest, and manifest.xml will be downloaded.
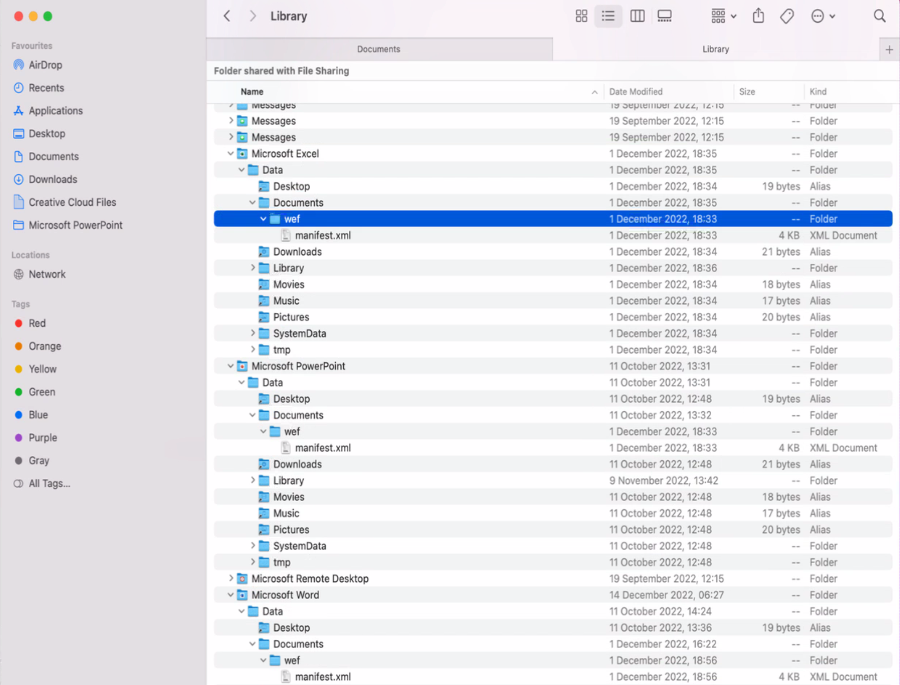
3 – manifest.xml should be copied to the folders specified below for Word, Excel, and PowerPoint.
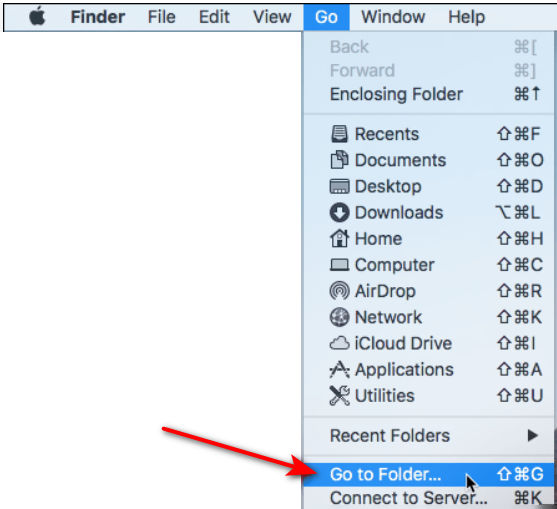
4 – Open Finder and click on Go > Go to Folder
Enter one of the following file paths, depending on the application you want to use the plugin in. If there is no <wef> folder, create it. Use your username instead of <username>.
-
For MS Word:
/Users/<username>/Library/Containers/Microsoft Word/Data/Documents/wef -
For MS Excel:
/Users/<username>/Library/Containers/Microsoft Excel/Data/Documents/wef -
For MS PowerPoint:
/Users/<username>/Library/Containers/Microsoft PowerPoint/Data/Documents/wef
5 – Copy the add-in manifest file to the wef folder.
6 – Launch Word (or Excel, or PowerPoint) and open the document. If MS Word was running before you copied the manifest, restart it.
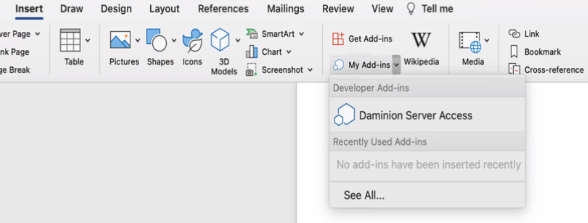
7 – In the opened document, navigate to Insert > My Add-ins > click on the down arrow > Daminion Server Access
Check out Daminion Connector for Microsoft Office: Functionality to learn how to work with the plugin.