This option is available in Daminion Server 7.6 or higher. Daminion Connector is not supported in Adobe Illustrator versions released before 2022!
Daminion Connector for Adobe Illustrator allows you to work with Adobe Illustrator files without the need to manually download files from Daminion for editing and upload them to Daminion to make the changes available to the team.
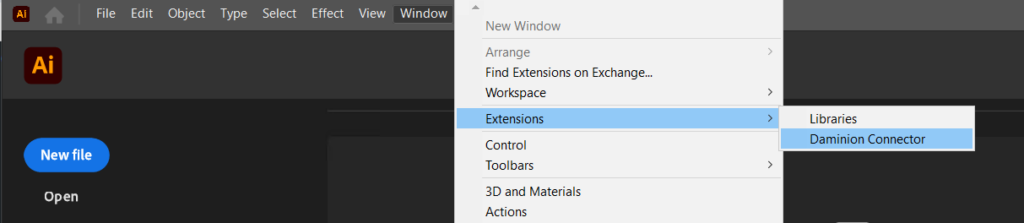
To activate the Daminion Connector in Adobe Illustrator, install Daminion Connector first. After that open Adobe Illustrator, click on “Window”, navigate to “Extensions” and click on “Daminion connector”.
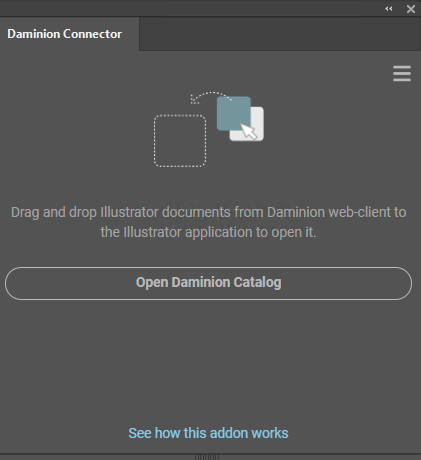
The Plugins panel with the Daminion Connector will be opened.

Enter the URL address of your Daminion web catalog and your login and password to connect to the catalog. Please use the same login credentials as you normally use to connect to your Daminion web catalog.
Once logged in, click the “Open Daminion Catalog” button to open this catalog in your default web browser.
Working with Daminion Connector in Adobe Illustrator
There are two possible ways of opening the files using Daminion Connector for Adobe Illustrator:
1 – Opening by direct link. If the file is located in the network folder in the local network, it will be opened from its original location without being downloaded locally to the user’s PC. The changes will be either applied to the original file or you can upload the edited file as a new assets using the Connector panel. Upload as a new version will not be available.
If the file is located in the network folder, but the changes should be submitted as a new version of the files, use Version Control in the Web Client.
2 – Opening by file’s ID. If the file is located in a local folder on the Daminion server or in Daminion cloud, a copy of the file will be downloaded locally to the user’s PC. The changes will be initially applied to the downloaded copy of the file and then submitted to the catalog using Daminion Connector. The process is described below.
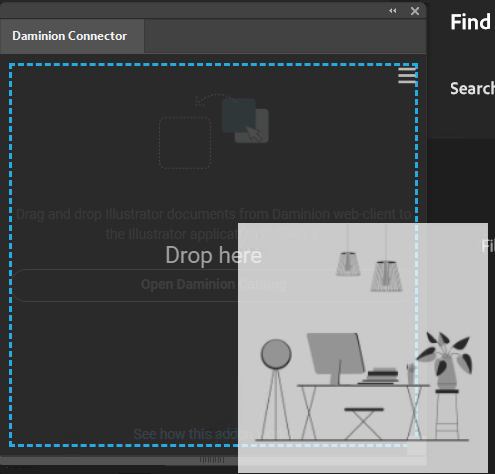
Daminion Connector allows you to drag and drop images to Adobe Illustrator right from the Daminion web catalog.
Daminion Connector Options
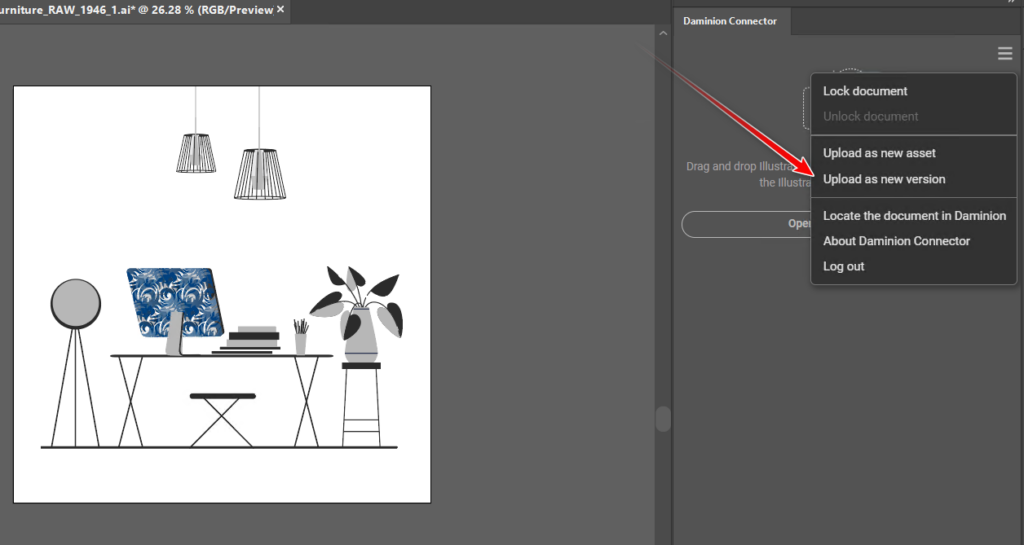
Click on the ![]() icon to select one of the available options:
icon to select one of the available options:
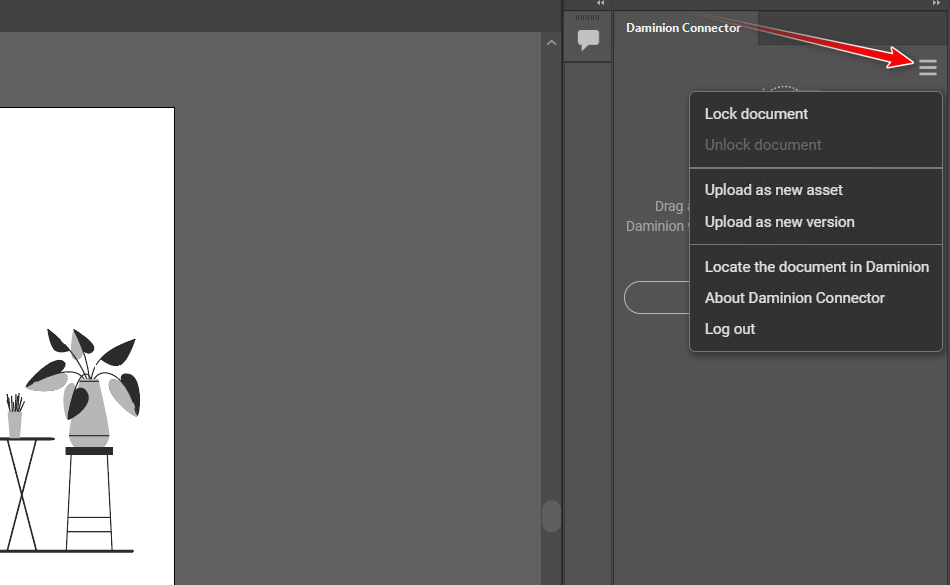
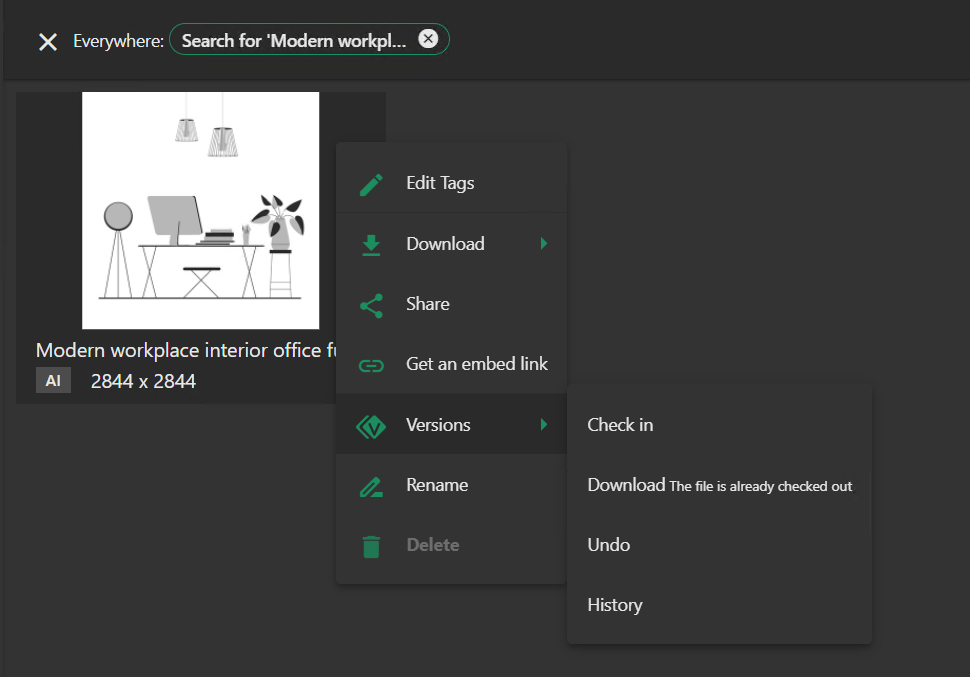
Lock document: This option locks the files in the catalog by checking them out and making them unavailable for editing by other users. When the file is locked, only the option “Upload as new version” gets available to submit changes to the catalog. To learn how it works in the background, refer to Version Control in the Web Client.
The screenshot below shows the checked-out status of this file in the Daminion catalog.
Unlock document: This option unlocks the file for editing by other users.
Upload as new asset: The edited file will be uploaded as a new asset and opened as a full-screen preview in the web browser. This option is not available if the document has been checked out and locked before editing.
Upload as new version: The edited file will be uploaded as a new version and will be available in the web catalog instantaneously. This option is available regardless of whether the document has been checked out and locked before editing or not. To learn more about Version Control in the Web Client.
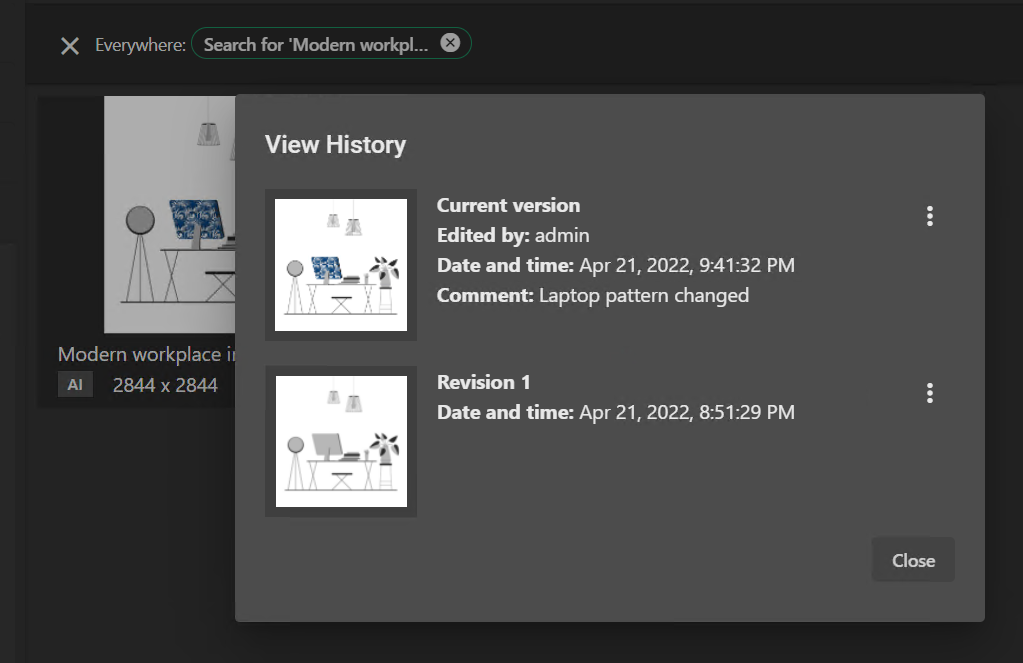
The following screenshot shows the Version History of this file in the Daminion web catalog.
Locate the document in Daminion: This option opens the document in the Daminion web catalog
About Daminion Connector: Click here to learn how the plugin works.
Log Out: Click here to log out.