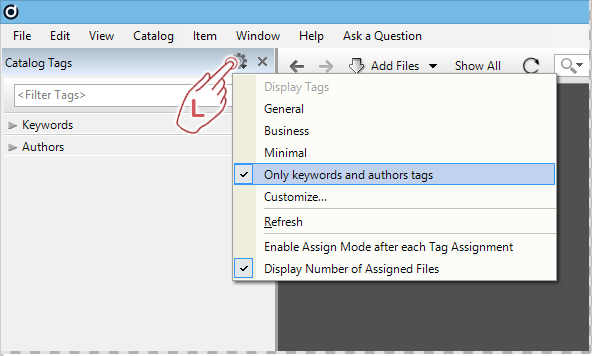
The catalog tags panel displays various types of annotation called tags. Tags can be used to describe your digital assets. Examples of tags are Keywords, Categories, Rating, etc.
Some tags, like Title or Description, can be displayed and edited via the Properties panel only.
It makes sense to create different custom presets for different tasks. For example, you can hide any tags that you don’t need for your current activity, e.g. indexing of images. This clears the Catalog Tags panel, which makes it much easier to locate the right tags in the tag tree.
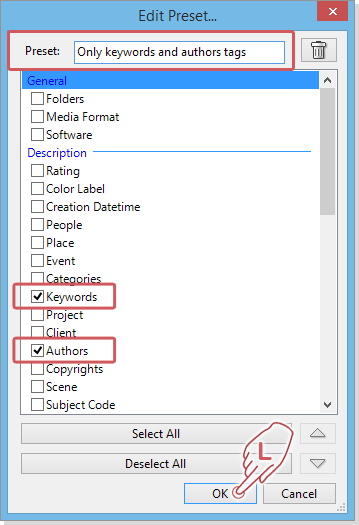
For example, you can customize your tag tree to display Keywords and Authors only.
How to customize the Tags panel
To customize the Catalog Tags panel, locate and click on the small gear icon in the panel header. This displays a menu with various options. The “Customize…” menu opens a dialog where you specify which tags should be displayed in the Catalog Tags panel and set their order.
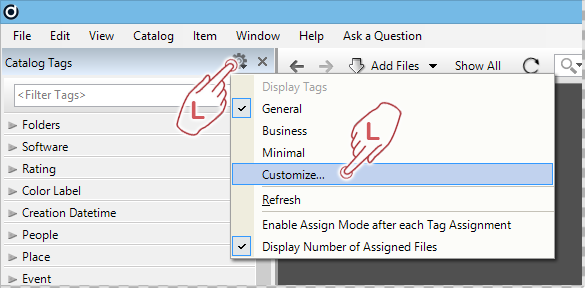
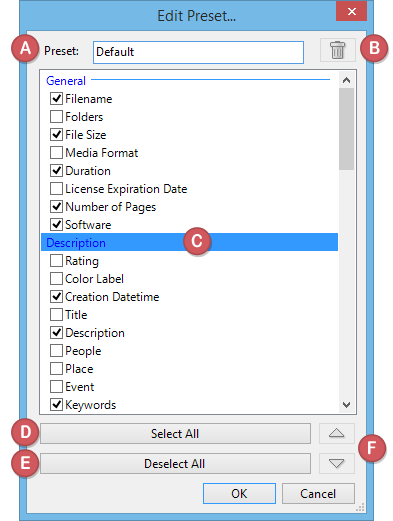
This opens the “Edit Presets…” dialog.
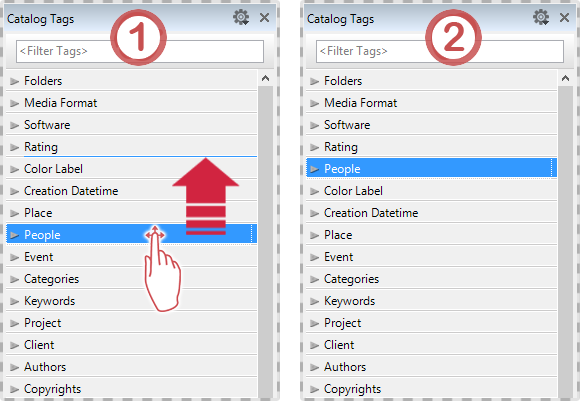
Click and hold the mouse cursor on one of the tags and drag it to its new position. The new location is indicated by a thin blue line. When you release the mouse, the tag will be moved to the new location.
After configuring and naming your view preset, close the dialog with the “OK” button.
The Catalog Tags panel now displays the two previously selected tags only, “Authors” and “keywords”. Your new preset will appear as a new entry in the selection list.
