Adding new files to an existing catalog
In order to manage your assets with Daminion, you must first import your data into a catalog. Daminion offers two ways of doing this.
You can use the dedicated Import option (described later in this chapter), or the rescan folder option, which synchronizes already imported folders within the Daminion catalog. The rescan folder option is described in “Rescan Folder Option“.
The Import dialog can be accessed either by clicking the “Add Files …” button (Ctrl + I) or by dragging and dropping files directly from Windows Explorer in the Daminion browser window. If the destination folder already exists in the Daminion catalog but doesn’t contain files to be imported, you can use the automatic folder synchronization instead (see “Automatic Folder Rescan“).
You can also import files using Windows copy/paste commands. Just copy the files from Windows Explorer (Ctrl + C) and paste them into the Daminion browser (Ctrl + V). The import dialog will open immediately with the files pasted in place.
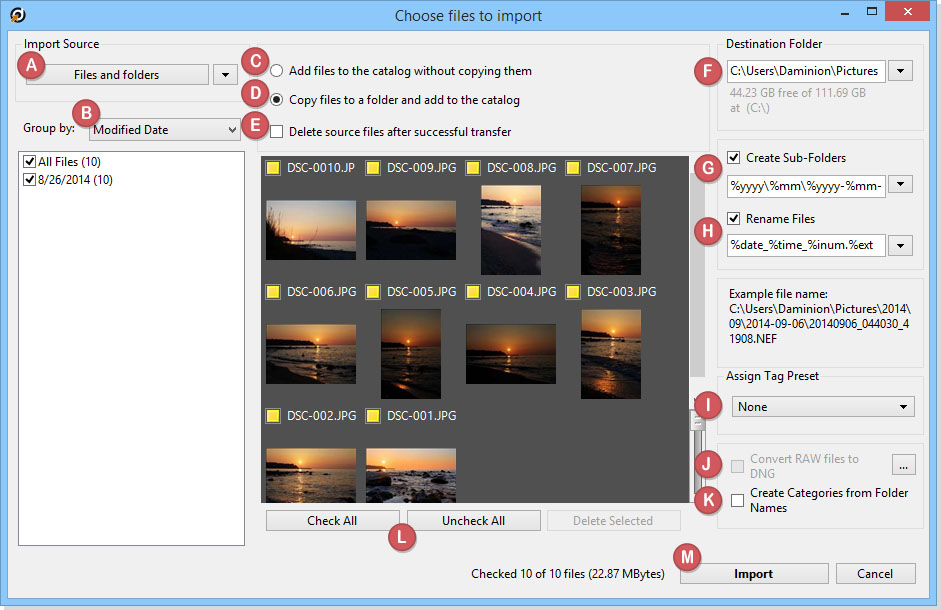
Overview of all functions in the import dialog
The Daminion Import Dialog
A – Import Source
Select a new source path for files to be imported.
B – Group by
Choose whether images are sorted by date, name, or file type.
C – Add files to the catalog without copying them
With this option selected, Daminion only reads the metadata from the files but leaves the actual files in the source folder (recommended if, for example, your files already exist in the desired destination folder).
D – Copy files to a folder and add to the catalog
When selecting this option, you must specify a source folder. See (F).
E – Delete source files after the successful transfer
With this option checked, Daminion deletes all files in the source folder after copying.
F – Destination folder
If (D) is enabled, Daminion needs to know where to copy the files. This can be either a local folder path or a network path. Please note, however, that files copied to local paths cannot be accessed by other users on the network.
G – Create Sub-Folders
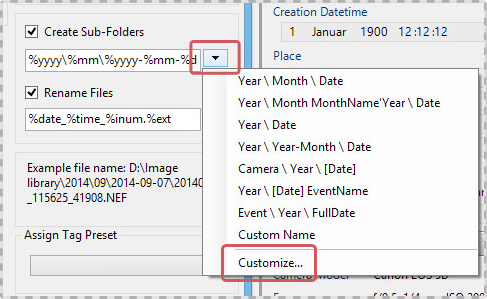
In addition to the specified destination path, Daminion can also create subfolders automatically using special tokens selected from the drop-down list. For example, you can program Daminion to create folder names by date, time, or by camera brand. Click on “Customize…” in the drop-down list to create your own naming scheme and save it for later use. Once saved, your customized naming schemes are added to the drop-down list. For more information please read Assigning Tag Preset.
H – Rename Files
With this option checked, files are renamed automatically during the import process. The procedure is the same as renaming folders.
I – Assign Tag Preset
Define your own tags and determine which should be assigned automatically during the import process. Once created, these import requirements can then be accessed from the Properties panel.
J – Convert RAW files to DNG
If you have the free Adobe DNG converter already installed on your PC, you can convert camera RAW files to the DNG format.
K – Create Categories from Folder Names
With this option checked, Daminion automatically creates category tags based on the names of source folders.
L – Check all/Uncheck all
Use these buttons to select or deselect all images in the import window.
M – Import
Closes dialog. Import begins.
Step-by-step instructions for importing your files
On the Daminion main screen, click the “Add Files” button (top left corner). This opens a submenu that displays all the connected devices you can import files from.
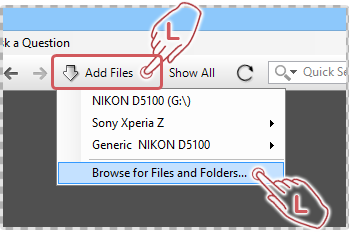
Available devices in our example are a digital camera and a smartphone.
But for now, we just want to import some files from the local hard drive.
Click “Browse files and folders” to open the Explorer window and select the path to the files you want to import.
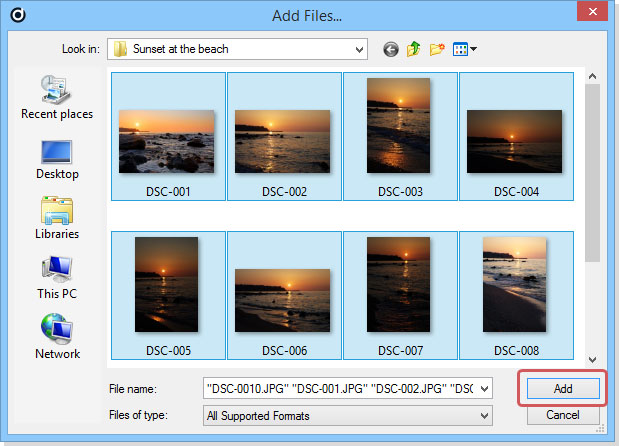
You can select individual files or an entire folder.
If you select a folder, all subfolders are imported as well.
Click the “Add” button to open the Daminion import dialog.
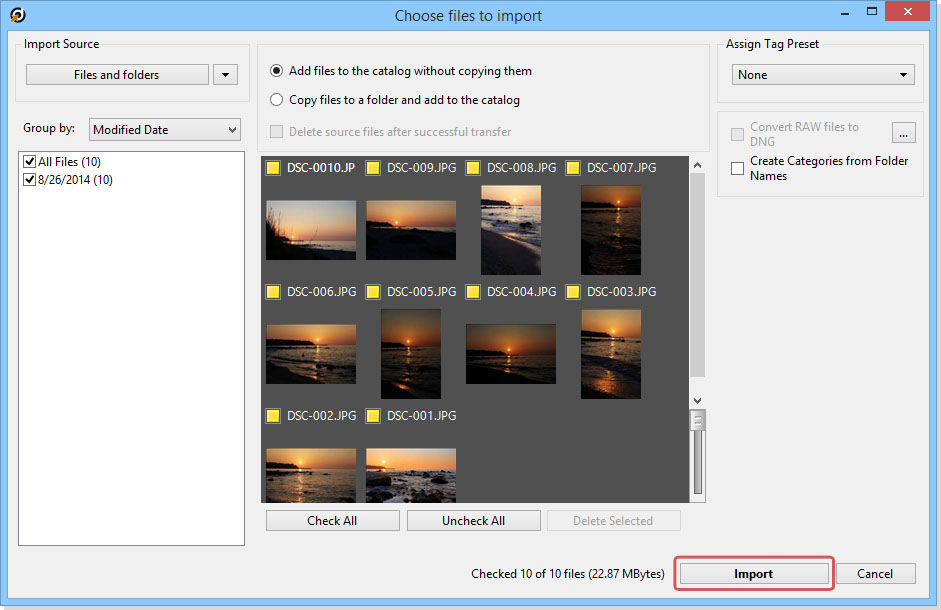
The selected files are now displayed as small thumbnails in the Import menu.
The little yellow squares above the previews indicate that these files are marked for import. You can leave the selection as it is or uncheck one or more previews by clicking the yellow square. When you hover the mouse over a preview of an image, it is automatically enlarged to make it easier to analyze.
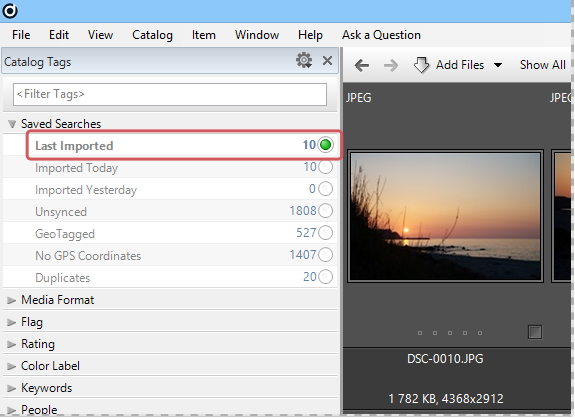
Click the “Import” button to start importing the selected images. Daminion now reads all metadata information from the files and links the original files with the catalog. Once imported, all images are displayed in the Daminion browser. The results of the import operations are also stored in the Tags Panel under “Saved Searches”. This allows you to recall all the files that belong to this import by clicking the small circle which will turn green.
Daminion saves three import-states: “Last Imported”, “Imported Today”, and “Imported Yesterday “.
In our example (see screenshot below), we have recently imported 10 files.
