This feature is only available in Daminion Team Server version!
Daminion safeguards your centralized image library against unintentional mishaps or deliberate actions affecting functionality and document integrity.
Every Daminion Server user can be assigned a role. While Admins and Editors can, among other options, import files and modify metadata, users with Viewer or Guest roles have restricted privileges – they can search, view, or export documents but cannot alter or remove assets. For detailed information on user roles, refer to our user roles documentation.
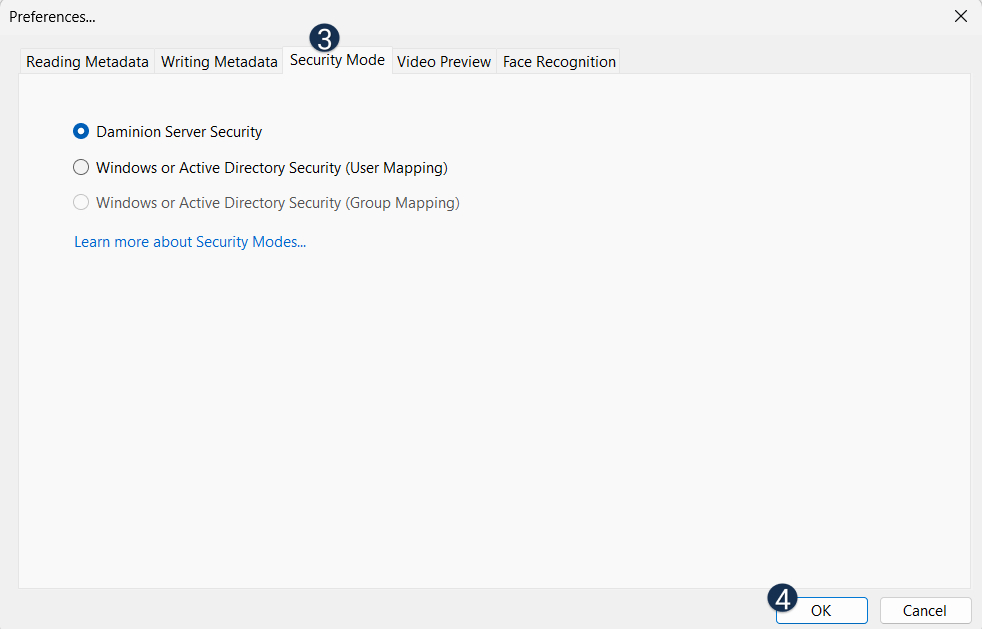
Supported Authentication Modes:
Daminion offers support for three authentication modes:
- Daminion Server Security
- Windows or Active Directory Security (Users)
- Windows or Active Directory Security (Groups)
Please note that the Windows or Active Directory Security (Groups) option is applicable only for the concurrent connections license type.
Switching Between Security Modes:
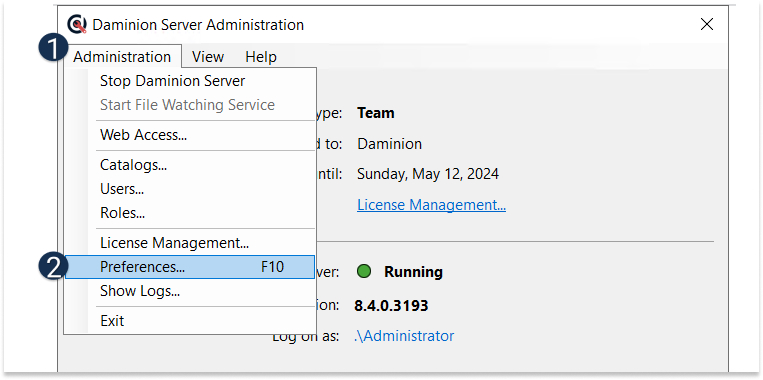
To change security modes, access the Daminion Server Administration panel, click on Administration, and go to Preferences. Navigate to the Security Mode section. It’s important to note that each switch between security modes necessitates restarting the Daminion Server. The system will prompt you to do this automatically upon exiting the Preferences menu.
Adding User Accounts
Daminion Server Security
Upon installing the Daminion Server, it automatically initiates in its default Security mode – Daminion Server Security. You can change this setting at any time by following the instructions provided above.
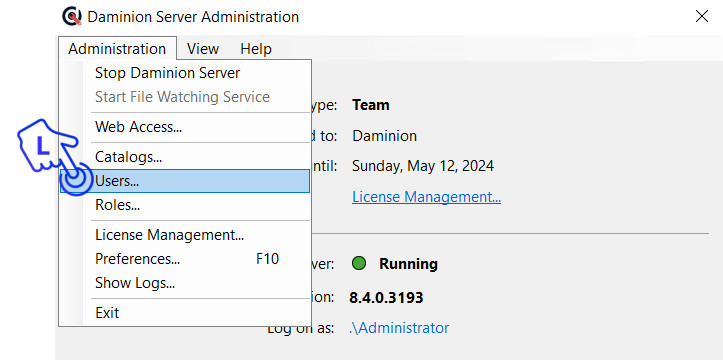
To access the Users menu, click on Administration and navigate to Users.
This will direct you to the Users menu, where you can manage and configure user accounts according to your requirements.
The Daminion Server Security mode enables the creation of users with access to Daminion shared catalogs. Within this mode, two default users are available:
Admin User:
Username: admin
Password: admin
Guest User:
Username: guest
Password: guest
You cannot delete these default users, but you can change their passwords or disable them.
For a more customized approach, additional user accounts can be created to precisely tailor access to Daminion shared catalogs based on your specific requirements. This allows you to configure user privileges in alignment with the unique needs of your workflow.
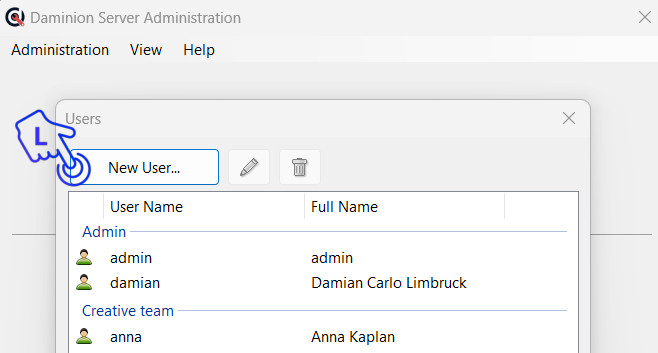
To create a new user, click on the New User button.
In the window that opens, enter User Name, Full Name, Password, and assign and assign a role to the user. Learn more about user roles here.

Two options merit special attention:
- Grant Dedicated Connection:
The “Grant dedicated connection” option enables the allocation of a reserved connection from the connection pool to a specific user. This feature is particularly valuable when using the concurrent connections license type, where users collectively share a limited number of connections. For instance, a power user, such as a master admin or someone responsible for tagging, can be assigned a dedicated connection to ensure consistent access to the catalog.
It’s important to note that with the Daminion named users license, all users inherently have dedicated connections.
- Account Disabled:
The “Account is disabled” option allows you to temporarily or permanently restrict a user’s access to the catalog. This can be useful, for example, to free up a named user seat under the Daminion named users license.
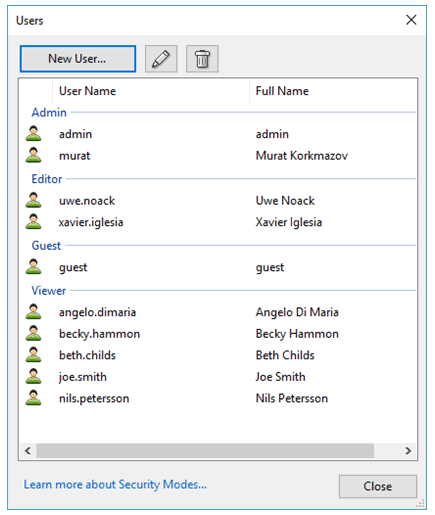
In the screenshot below, you can see all the existing users sorted by the roles assigned to them.
To edit an existing user, select their name and click the pencil icon located above. Utilize the Edit menu to disable the created user account or grant it a dedicated connection.
To delete a user, select their name and click the bin icon.
Windows or Active Directory Security (Users)
In this mode, you have the capability to map Windows or Active Directory (AD) users with Daminion. This integration ensures seamless authentication and access control, allowing for a unified and secure user management experience.
By leveraging this mode, you can synchronize and manage user accounts directly from your Windows or Active Directory system within the Daminion environment.
This enhances efficiency and simplifies user administration, ensuring that access to Daminion is aligned with your existing Windows or AD user structure.
- Mapping Windows or AD users with Daminion:
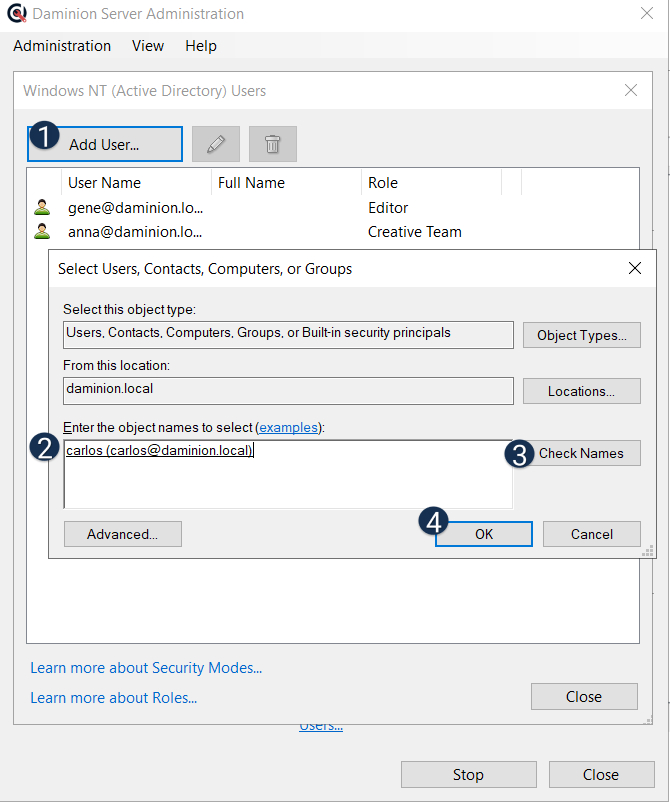
To map Windows or AD users, change the Security mode to Windows or Active Directory Security (Users) and restart Daminion Server. After that, navigate to the Users menu and click Add User.
In the following dialog, you will be prompted to add a Windows or AD user. Change the search location to Entire Directory or a specific domain by clicking the Locations button, then start typing the name of the user and click Check Names. Once the user is allocated, click OK.
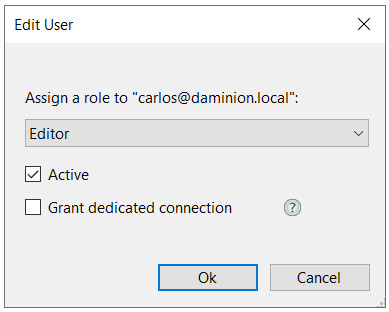
The Edit User dialog window appears where you can assign a role to this user, activate the account, or grant a dedicated connection.
Windows or Active Directory Security (Groups)
In this mode, Daminion integrates with Windows or Active Directory (AD) security groups, providing a robust solution for streamlined user access management. By employing this integration, you can map security groups from your Windows or AD environment directly to Daminion, ensuring a coherent and efficient user authentication process.
This approach facilitates the assignment of permissions and roles to entire security groups, simplifying the administration of access levels within Daminion.
Any changes made to group memberships or access rights in the Windows or AD system will be reflected in Daminion, maintaining consistency and security across your organization’s digital asset management.
- Mapping Windows or AD groups with Daminion:
To map Windows or AD groups, change the Security mode to Windows or Active Directory Security (Groups) and restart Daminion Server. After that, navigate to the Users menu.
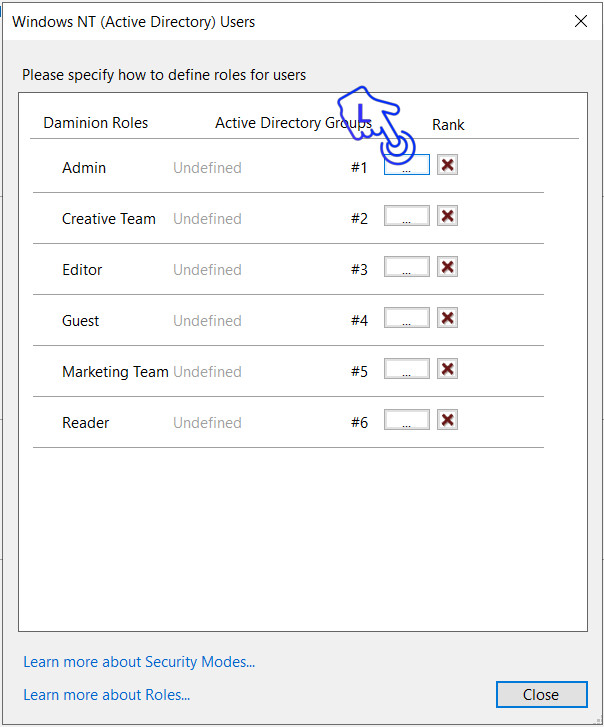
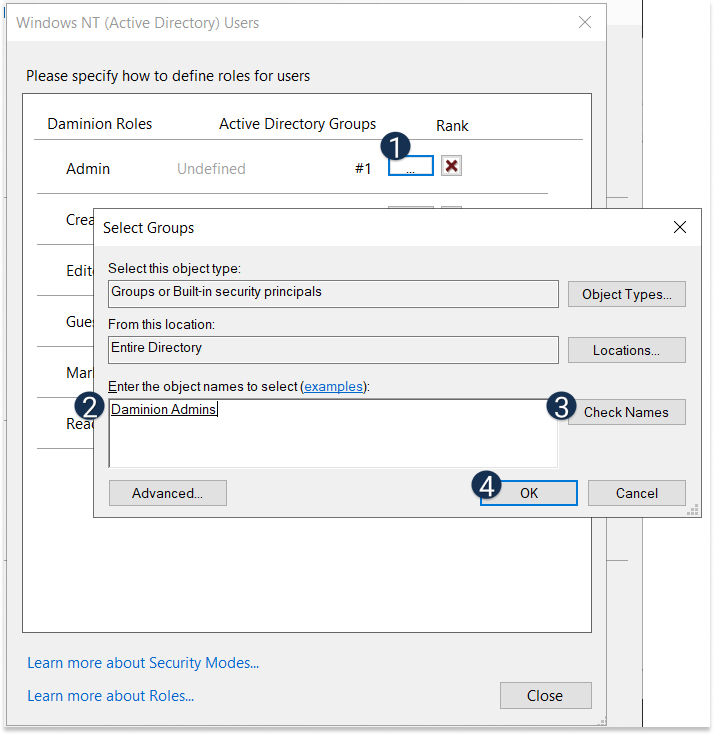
In the dialog that opens, you will see all available user roles (default and custom) that can be mapped with Windows or AD Groups.
To initiate group mapping, click the three dots button next to a user role:
In the following dialog, you will be prompted to add a Windows or AD group. Change the search location to Entire Directory or a specific domain by clicking the Locations button, then start typing the name of the group and click Check Names. Once the group is allocated, click OK.
Note: Users and Roles are configured at the Server level through the Daminion Server Administration panel or Web Client (which only allows you to manage users under Daminion Server Security mode).
However, it is not necessary to have all user roles mapped with user groups on the global level. Some roles can be utilized exclusively for access control at the catalog level.
Access control on the catalog level can work with all three security modes. For further details, refer to the article Creating a new Shared Catalog.